
BLOG / ARTÍCULOS DE DREAMWERKS

How to Install a Shower Kit Without Any Hidden Leaks
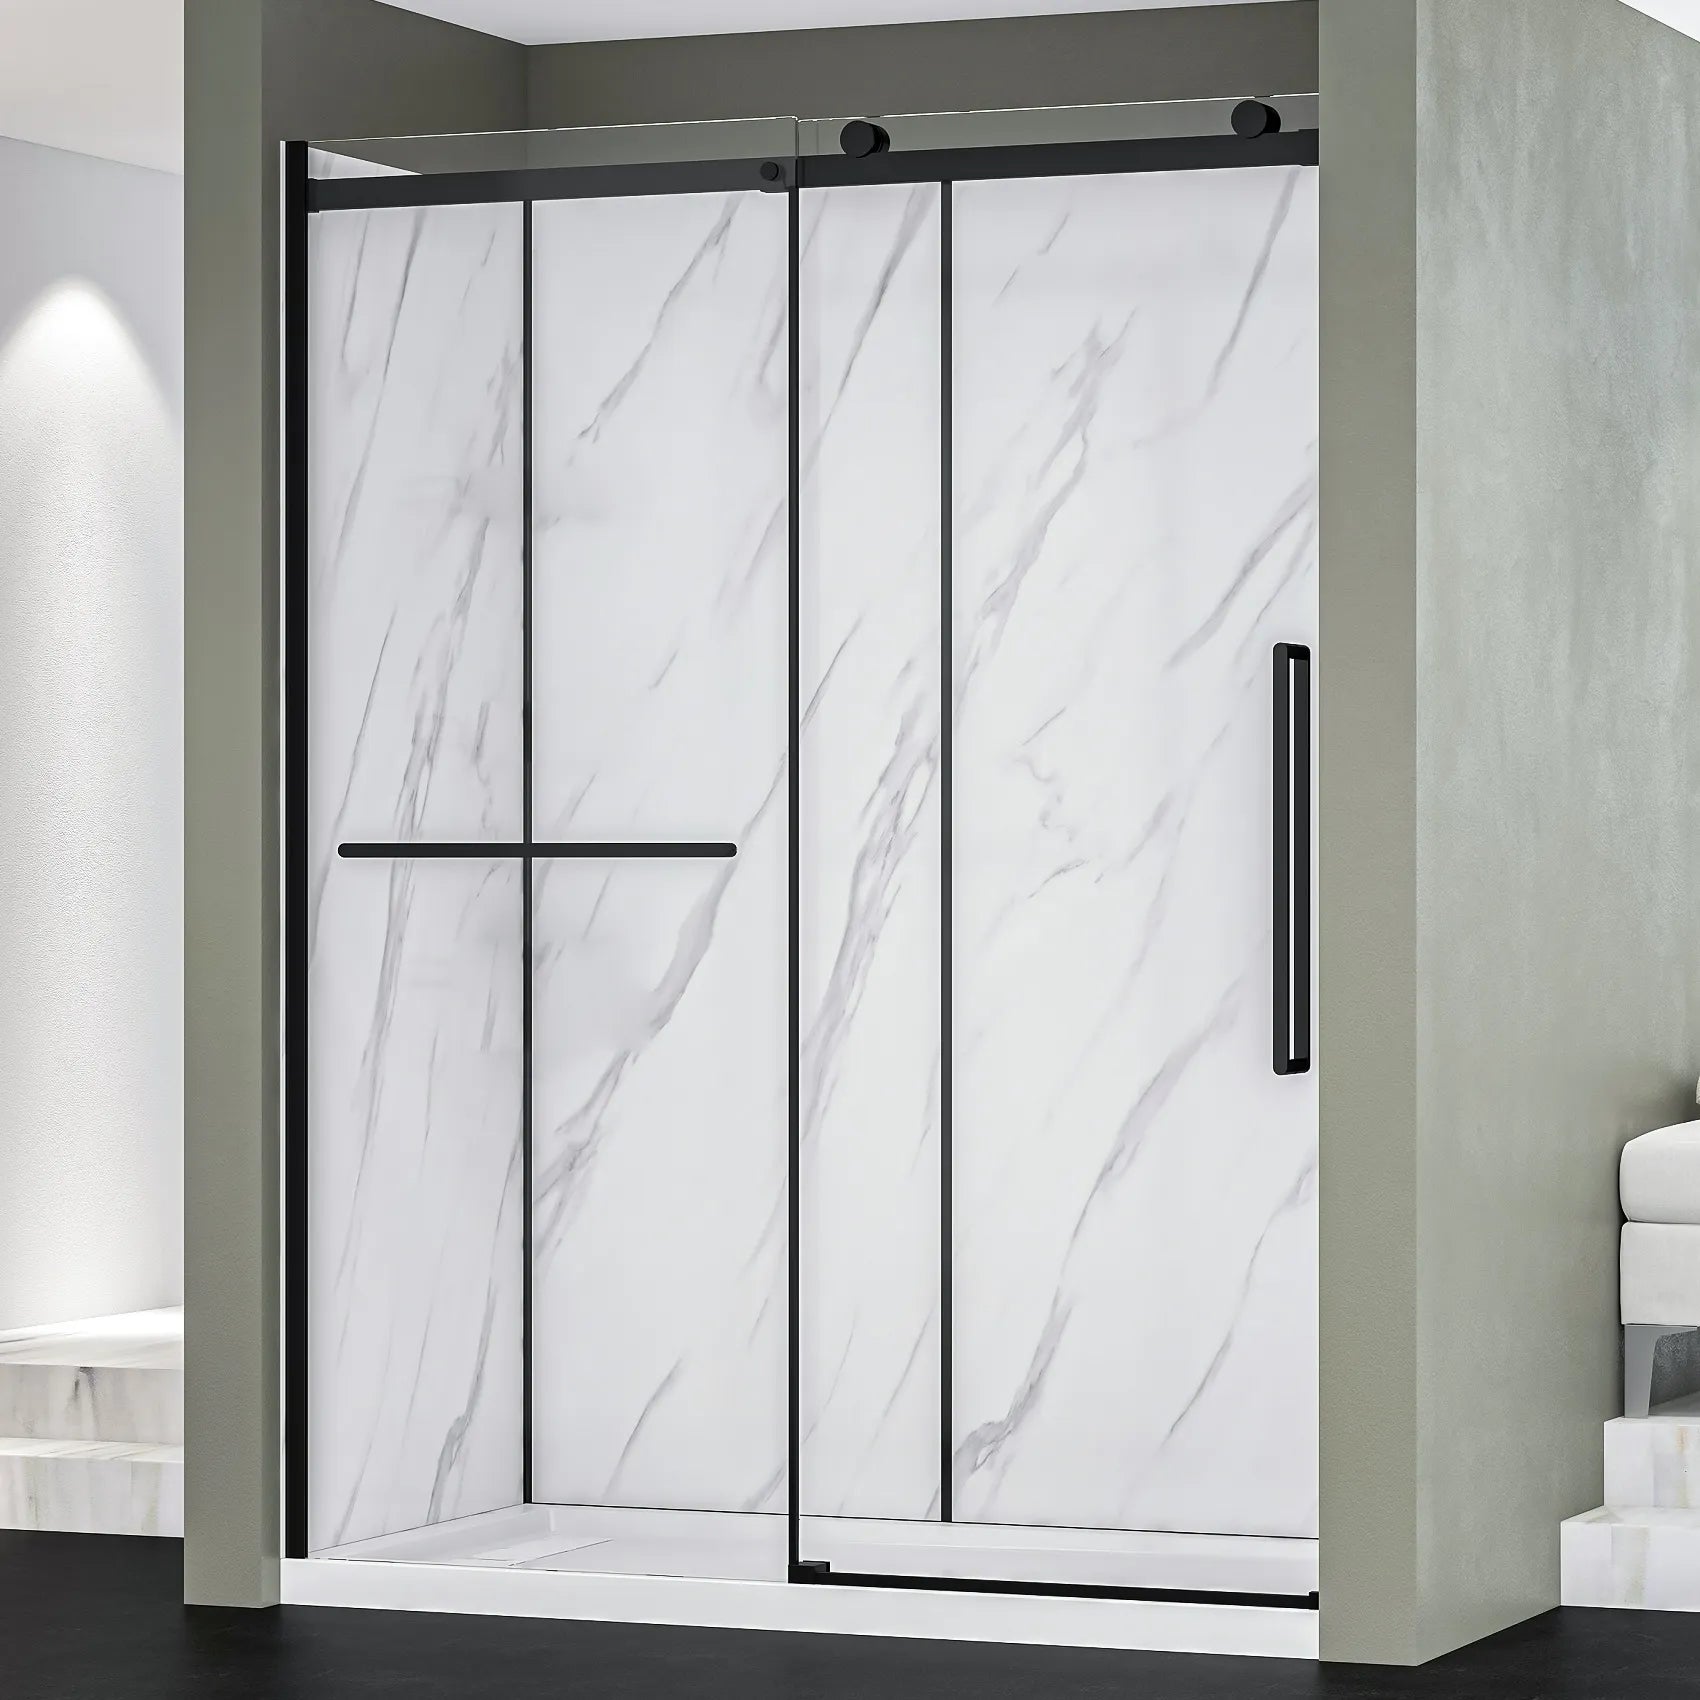
Let's be honest - a leaky shower is one of the most frustrating things to deal with at home. You spend a weekend putting everything together, turn on the water, and then notice a slow drip behind the wall or under the base a few days later. The good news? If you plan things right from the start, you can completely avoid that nightmare. Whether you're doing a full bathroom remodel or just upgrading an old setup, knowing how to install a shower kit the right way makes all the difference. This guide walks you through the whole process in plain language - no confusing jargon, no skipping the important parts. By the end, you'll know exactly what to do and what to watch out for. Why Picking the Right Shower Kit Matters Before You Even Start A lot of people jump straight into installation without thinking much about which product they're working with. But the type of kit you choose has a big impact on how smooth the process goes. There are complete shower kits that come with everything bundled together - walls, a base, a door or curtain rod, and sometimes even the fixtures. These are great if you want a straightforward setup with fewer decisions to make along the way. If your bathroom has an angled wall or a tight space in one corner, corner shower kits are worth a close look. They're designed specifically to fit into corners and save floor space, which is a big deal in smaller bathrooms. They also tend to look clean and modern, so you're not sacrificing style for function. Before buying anything, measure your bathroom carefully. Note the width, depth, and ceiling height of the space you're working with. Also check your current plumbing setup - where the drain is, where the water supply lines come in, and whether there's a wall stud where you'll need to anchor things. Tools and Materials You'll Need Getting everything together before you start saves a ton of back-and-forth. Here's what most shower kit installations require: • Drill and drill bits • Level (a long one works best) • Utility knife • Tape measure • Screwdriver set • Caulk gun • Silicone caulk (100% waterproof) • Mortar mix or foam base support (if needed) • Plumber's putty or plumber's tape • Safety glasses and gloves You might also want a rubber mallet for tapping pieces into place without cracking them. And always keep a bucket and some old towels nearby - plumbing work tends to get a little messy. Step 1: Prep the Space and Remove the Old Setup If you're replacing an existing shower, turn off the water supply first. Then remove the old fixtures, walls, and base. Check the subfloor underneath - if there are any soft spots, water damage, or rot, you'll want to fix that before going any further. Trying to install a shower base over a damaged subfloor is a recipe for future problems. Once the old stuff is out, give the walls and floor a good look. Make sure the framing is solid and the walls are plumb (straight up and down). If anything is off by more than a quarter inch, it can cause your panels to sit unevenly, which creates gaps where water can sneak through. Step 2: Install Shower Base - This Is the Most Important Step Here's the truth: most leaks come from a poorly installed base, not from the walls or fixtures. That's why we're dedicating a full section to this one step. To properly install a shower base, you need to make sure it's perfectly level. A base that's even slightly off can cause water to pool and eventually find its way through small gaps. Connect the Drain First Position the base over the drain opening and connect the drain assembly before you set anything permanently. Apply plumber's putty around the drain flange, press it into place, and tighten the drain body from underneath. Some modern bases use a snap-in drain that's easier to work with - check your kit's instructions for the exact method. Level the Base and Secure It Once the drain is connected, set the base in place and use your level to check it in multiple directions. Most shower kits come with adjustable legs or suggest using a mortar bed underneath for support. If you skip the mortar bed on an acrylic or fiberglass base, it can flex when you step on it, eventually cracking the seal around the drain. Apply a bead of silicone caulk where the base meets the wall studs and along the back edge of the base. Press the base down firmly and let the caulk cure before you move on. Don't rush this - 24 hours minimum, 48 is better. Step 3: Put Up the Wall Panels Now comes the part most people actually think of when they picture shower kit installation. Most kits include three or four wall panels that interlock or overlap at the seams. Before you stick anything to the wall, do a dry fit - hold each panel in place without adhesive to confirm everything lines up with your plumbing cutouts and the base. Mark where your showerhead and faucet handles will poke through the wall, then cut those holes before applying adhesive. A hole saw works great for clean, round cutouts. Apply Adhesive and Hang the Panels Use the adhesive recommended by your kit's manufacturer - not all adhesives work well with acrylic or fiberglass surfaces. Apply it in vertical strips on the back of the panel, press it to the wall, and hold or brace it in place while it grabs. Start with the back wall, then move to the sides. Make sure each panel is plumb before it sets. After all panels are up, seal every seam with silicone caulk. Don't use grout here - it's not flexible enough and will crack over time. Focus especially on the corners and the joint where the walls meet the base. Those are the spots most likely to let in water if they're not properly sealed. Step 4: Hook Up the Fixtures and Showerhead With the walls up and cured, it's time to connect the plumbing fixtures. This is where things vary a bit depending on whether your kit includes fixtures or you're installing them separately. If you bought one of the shower kits that came with faucet hardware, follow the included instructions carefully - every brand does it a little differently. Wrap plumber's tape (Teflon tape) around all threaded connections. It only takes a minute and prevents the tiny, slow leaks that are a pain to track down later. Hand-tighten first, then snug it up with a wrench. Don't over-tighten - especially on plastic fittings, which crack more easily than they look. Connect the showerhead arm to the supply line stub-out in the wall, then attach the showerhead itself. Test for leaks before you close up the wall or move on to the enclosure. Step 5: Install the Shower Enclosure or Door If your kit includes a shower enclosure kit, now's the time to install it. Most sliding door systems come with a top and bottom track, side jambs, and the door panels themselves. Attach the bottom track to the base first - it usually screws directly into the base or floor. Then set the vertical jambs against the wall, making sure they're plumb. Attach the top track last. Slide the door panels into the tracks and test them - they should glide smoothly with no wobble. Seal around the bottom of the jambs with silicone caulk to prevent water from getting under the track and sitting on the floor. FAQ: How to Install a Shower Kit Without Hidden Leaks What's the most common reason shower kits leak? Most leaks happen because the base wasn't properly leveled, or because corners and seams weren't caulked well enough. Even a tiny gap in a corner joint can let water in over time, especially with daily use. Always use 100% silicone caulk (not latex) and give it at least 24 hours to fully cure before running water. Do I need a plumber to install a shower kit? Not necessarily. If you're replacing an existing shower with a similar setup and the plumbing is already in place, most handy homeowners can handle the whole project themselves. However, if you're moving drain locations, adding new water supply lines, or dealing with a complicated existing setup, it's worth calling a licensed plumber for at least that portion of the work. Are corner shower kits harder to install than standard ones? Corner shower kits are actually pretty similar in difficulty to standard setups. The main difference is that you're working with two walls instead of three, and you need to make sure both walls meet at a clean 90-degree angle. If your walls are slightly off, the kit may not fit flush, which can create gaps. It's a good idea to check the angle with a square before you start. What type of caulk should I use for shower installation? Always use 100% silicone caulk for shower applications. It stays flexible, doesn't crack with normal movement, and is highly resistant to water and mold. Avoid acrylic or latex caulk in wet areas - it breaks down faster and won't hold up the way silicone does. Look for a product labeled 'kitchen and bath' or 'mold resistant' for the best results. How long does a shower kit installation take? For someone doing it for the first time, plan on a full weekend - one day for demo and prep, and one day for the actual installation. A lot of that time is waiting for caulk and adhesive to cure. If you try to rush those drying times, you're asking for trouble. Experienced DIYers who know how to install shower systems can sometimes knock out the whole thing in a single day, but it's better to give yourself more time than you think you'll need. Can I use any shower kit in a small bathroom? Size matters a lot here. Standard shower kits come in common sizes like 32x32, 36x36, and 36x48 inches. Measure your space carefully and pick a kit that fits with a little room to spare - you don't want to be cutting panels or forcing things to fit. If space is really tight, corner shower kits are often your best bet since they tuck neatly into a corner and maximize the usable floor area. A Few Final Tips Before You Wrap Up Once everything is installed, do a full leak test before you tile or close up any walls. Run the shower for a good 10–15 minutes and check every connection - behind the wall where you can see, under the base, and around the drain. Use a flashlight. Even a slow drip can cause major water damage over months of daily use. Also, keep in mind that learning how to install shower systems properly is a skill that pays off for life. Once you've done one installation, the next one goes much faster and with a lot more confidence. Take photos as you go - not just for reference if something goes wrong, but because it's genuinely satisfying to look back at the before and after. Take your time on the base and sealing steps. Be patient with cure times. Follow the manufacturer's instructions for your specific kit, since details vary between brands. And don't hesitate to watch a few installation videos for your exact model before you start - seeing it done once in real time is worth more than reading ten paragraphs about it. You've Got This Installing a shower yourself is one of those home improvement projects that feels really intimidating until you're actually doing it. With the right prep work and a little patience, most homeowners can pull it off without hiring anyone. The secret to a leak-free result isn't anything complicated - it's just doing each step carefully and not cutting corners on the sealing and leveling. Whether you went with a simple three-wall kit or one of the fancier complete shower kits with a built-in seat and niche, the process is the same at its core. Plan well, measure twice, seal everything properly, and you'll have a shower that stays dry where it's supposed to stay dry - and keeps water where it belongs.
Leer másBLOG / ARTÍCULOS DE DREAMWERKS

Steps to Install Shower Base Tracks on Uneven Floors
Let's be honest - uneven bathroom floors are a pain. If you've ever tried to install shower base tracks and ended up with gaps, rocking panels, or water pooling in the wrong places, you already know the struggle. The good news? This is totally fixable, even if you're not a professional contractor. With the right prep work and a little patience, you can get a watertight, solid result that looks great and lasts for years. This guide walks you through every step of how to install shower base tracks on an uneven floor - from checking your floor level to sealing everything up at the end. We'll also cover some common questions people have about shower kit installation so you can feel confident before you start. Why the Floor Level Matters So Much Before we get into the steps, it helps to understand why an uneven floor causes so many problems in the first place. When you install shower base tracks, those tracks form the bottom perimeter of your shower walls. If the floor isn't level, the tracks won't sit flat - and that means leaks, unstable panels, and a shower that just doesn't look right. Most complete shower kits are designed with some degree of adjustment in mind, but they're not magic. A variance of more than 1/4 inch across the base area usually needs to be corrected before installation. The fix doesn't have to be complicated, but skipping this step will cause you headaches down the road. Tools and Materials You'll Need Gather everything before you start. Here's what you'll need for a typical shower kit installation: • Spirit level or laser level • Self-leveling compound or floor shims • Tape measure • Pencil or chalk line • Drill with bits • Hacksaw or track cutter • Silicone caulk (waterproof) • Caulk gun • Rubber mallet • Safety glasses and gloves Having all of this on hand before you begin saves you from stopping mid-job to run to the hardware store. Trust us - it's worth the prep time. Step 1: Assess the Floor and Find the High and Low Spots Place your spirit level in multiple directions across the shower area - side to side, front to back, and diagonally. Mark the high and low spots with a pencil. You're looking for the total variance, which tells you how much correction you need. If the floor is off by less than 1/8 inch, you can often get away with shimming the base tracks directly. For larger gaps, self-leveling compound is your best bet. It flows into low spots and dries flat, giving you a solid, even surface to work on. Step 2: Level the Surface Before You Install the Shower Base If you're using self-leveling compound, follow the manufacturer's directions carefully. In most cases, you'll need to clean the floor thoroughly, apply a primer, and then pour the compound. It spreads on its own, but you may need to guide it into corners with a trowel. Let it cure fully - usually 24 hours - before moving on. If you're shimming instead, plastic shims work better than wood in a wet environment. Place them at the low points under where the base tracks will sit. You'll fine-tune these as you go, so don't glue anything down yet. The goal at this stage is just to get close. This prep step is what separates a clean install from a messy one. Whether you're working with corner shower kits or a larger walk-in configuration, a level base makes everything else easier. Step 3: Dry-Fit the Tracks and Mark Your Positions Before you seal anything down, do a dry fit. Lay the base tracks in position without any caulk or adhesive. This lets you check that the corners align properly, the tracks sit flat, and the overall footprint matches your shower area. Once everything looks right, use a pencil to trace the outline of each track onto the floor. This gives you a guide to work from when you apply caulk. It also helps you confirm your measurements before you commit. For corner shower kits, pay extra attention to the 90-degree corners. These are the spots most likely to have alignment issues, especially on uneven floors. Take your time here and double-check with your level before marking. Step 4: Cut the Tracks to Length Most shower enclosure kits come with tracks that need to be cut to fit your specific space. Use a hacksaw or a fine-tooth saw for clean cuts. Measure twice, cut once - the old advice is still the best advice. For the front track (the one facing the shower opening), you'll need to account for the door or curtain opening. If your shower enclosure kits include a door, check the instructions for the exact measurement. Some kits require a specific overlap for the door to seal correctly. After cutting, smooth any rough edges with a metal file. Sharp edges can damage seals and scratch the shower base, so this step is worth the few extra minutes it takes. Step 5: Apply Caulk and Set the Tracks in Place Run a bead of waterproof silicone caulk along the bottom of each track. Keep the bead continuous - gaps in the caulk line are the #1 cause of leaks in shower installations. Then press each track firmly into position, aligning it with your pencil marks. If you're shimming, this is the time to finalize the shim positions. Press the track down onto the shims and check your level again. Adjust as needed until the track sits perfectly flat. Then apply caulk around the outside perimeter to lock everything in and seal out moisture. Use a rubber mallet to gently tap the tracks into full contact with the floor. Don't force it - if a section won't sit flat, a shim is probably in the wrong place. Work slowly and recheck your level as you go. Step 6: Let It Cure, Then Build Up the Rest of Your Shower Give the caulk at least 24 hours to cure before you move on to installing wall panels or doors. It's tempting to rush this part, but moving on too soon can shift the tracks and ruin your level base. Set a timer and walk away. Once the caulk is fully set, you can proceed with the rest of how to install shower components - walls, panels, glass enclosures, and fixtures. If you're working with the install a shower kit instructions from the manufacturer, follow them in order from this point. The hard part is behind you. Installing wall panels into properly seated base tracks is straightforward compared to the floor work. The panels should slot in cleanly, and the corners should line up without forcing. Frequently Asked Questions Can I install shower base tracks on a tile floor? Yes, but tile floors add a layer of complexity because grout lines can create uneven contact points. You'll want to check the level across multiple tiles and use silicone caulk generously to fill any gaps between the track and the grout lines. Avoid drilling into tile unless necessary - most tracks rely on caulk adhesion rather than mechanical fasteners. How much floor variance is acceptable? Most manufacturer guidelines for complete shower kits allow for up to 1/4 inch of variance without requiring a leveling compound. Beyond that, you should address the floor before installation. Even if the kit can technically accommodate more variance, a flatter surface will always give you a better result. Do I need special tools to install a shower kit? Nothing exotic. A level, a tape measure, a hacksaw, and a caulking gun are the basics. Some people add a power drill for wall anchors, but many modern shower kits are designed for tool-minimal installation. If you're upgrading from an older setup or replacing luxury bathtubs with a shower enclosure, check what's already in your bathroom - the tools you need may already be on hand. What's the best caulk to use for shower base tracks? 100% silicone caulk is the standard recommendation for shower installations. It's fully waterproof, flexible enough to handle minor movement, and holds up well in wet environments. Avoid latex or acrylic caulk for the base tracks - they don't hold up as well under constant moisture exposure. How do I know if my shower base tracks are properly installed? After the caulk cures, check for three things: the tracks should be fully flush with the floor (no rocking), there should be no visible gaps in the caulk line, and the corners should meet cleanly without overlapping awkwardly. Run your hand along the inside edge of the track - it should be smooth. Any rough spots or gaps should be re-caulked before you install the wall panels. A Few Tips Specific to Different Shower Kit Types Not all kits are created equal, and the type you're working with can affect your approach slightly. Corner Shower Kits Corner shower kits fit into the corner of a room, which means two walls are already fixed. That limits your ability to adjust position after the tracks are down, so accuracy during the dry-fit stage is extra important. Get the corner square before you do anything else. Shower Enclosure Kits with Glass Panels Glass panels are heavy, and even a slight misalignment in the base tracks can make them hard to slot in properly. Be extra precise when leveling, and make sure the tracks are aligned perfectly before the caulk sets. If you're replacing luxury bathtubs with a glass shower enclosure, you may also need to remove tile or drywall around the tub area before setting the new tracks. How to Install Shower Kit Components After the Base Once your tracks are down and cured, follow the manufacturer's sequence for how to install shower kit components. Most kits start with wall panels before the door or glass. Don't skip steps or try to install everything at once - the sequence is designed to make each step easier than the one before. Final Thoughts Learning how to install shower components on an uneven floor takes a bit more patience than a standard flat-floor installation, but it's absolutely within reach for a motivated DIYer. The key is in the prep - level the floor, dry-fit your tracks, and don't rush the caulk cure time. Whether you're working with corner shower kits, installing a shower kit that came as a complete package, or piecing together individual shower enclosure kits, the base track installation process is the same. Get that foundation right, and the rest of the build is much more straightforward. If you ran into a specific challenge not covered here, drop it in the comments - uneven floors come in all shapes, and there's usually a workable solution. Good luck with your project!

Why an Integrated Sink Vanity Saves You Hours of Cleaning
Let's be real - nobody enjoys scrubbing around a bathroom sink. The gunk that builds up in the gap between the basin and the countertop? That's the stuff cleaning nightmares are made of. If you've ever spent 20 minutes with a toothbrush trying to dig out mildew from that tiny crevice, you already know the pain. That's exactly why so many homeowners are switching to an integrated sink vanity. It's one of those home upgrades that sounds fancy but actually just makes your life easier. No seams. No grout lines around the basin. Just one smooth, continuous surface that wipes down in seconds. In this post, we're going to break down why an integrated sink vanity is such a game-changer for cleaning, what materials to look for, and how to find the right style for your bathroom - whether you're going for sleek and modern or warm and classic. What Is an Integrated Sink Vanity, Anyway? An integrated sink vanity is exactly what it sounds like - a vanity unit where the sink and the countertop are made from one single piece of material. There's no separate basin dropped into a hole, no caulking around the edges, and no rim collecting soap residue. The whole unit is molded or carved from the same material, so cleaning is as simple as wiping the whole surface down at once. One smooth swipe and you're done. Compare that to a drop-in sink, where you've got a metal rim sitting on top of the countertop, creating a perfect little trap for water, soap, and toothpaste. That rim needs to be cleaned separately; the caulk underneath turns gray over time, and eventually it starts looking grimy no matter how often you clean. The integrated design just… eliminates that problem completely. The Real Reason It Saves You So Much Time Here's the thing most people don't realize until they actually make the switch: it's not just that cleaning is faster - it's that you clean less often because there's nowhere for the dirt to hide. With a traditional vanity setup, bacteria and mold love to live in: The gap between the sink rim and the countertop The caulk line around the base of the basin The underside of the faucet holes where water splashes back Grout lines in a tiled countertop An integrated sink vanity has none of those problem spots. The surface is completely smooth and continuous, so splashed water doesn't get trapped - it just runs down into the drain or gets wiped away easily. That means less mold, less mildew, and less elbow grease on your part. Most homeowners who switch report cutting their bathroom cleaning time nearly in half. That's real time back in your week, every single week. Material Matters: What Your Integrated Sink Is Made From Changes Everything Not all integrated sink vanities are created equal. The material your vanity top is made from affects how easy it is to clean, how long it lasts, and how good it looks over time. Here's a quick rundown of the most popular options. Ceramic Vanity Top A ceramic vanity top is one of the most popular choices for good reason. Ceramic is hard, non-porous, and incredibly resistant to staining. Toothpaste, hairspray, makeup - none of it soaks in. You just wipe it off. Ceramic is also naturally resistant to mold and bacteria, which makes it a smart pick for a wet environment like a bathroom. It holds up well to household cleaners, and a ceramic vanity top doesn't need any special sealing or maintenance. Just wipe it down, and you're done. The downside? It can chip if you drop something heavy on it. But day-to-day cleaning? Easy. Cultured Marble Vanity A cultured marble vanity is made from a mix of ground marble and resin, then cast into shape. Because it's molded as one unit, the sink and countertop are completely seamless - which is ideal if easy cleaning is your priority. The gel-coat finish on a cultured marble vanity is smooth and non-porous, which means it resists staining naturally. It also comes in a huge range of colors and patterns, including ones that look very similar to real marble at a fraction of the cost. One thing to keep in mind: the gel-coat can scratch if you use abrasive cleaners, so stick to soft cloths and mild soap. Marble Vanity Top If you want something truly high-end, a real marble vanity top is hard to beat. The natural veining and depth of genuine marble make every piece unique, and it adds a level of luxury to a bathroom that other materials just can't replicate. That said, natural marble is porous, which means it needs to be sealed regularly to prevent staining. A marble vanity top requires a little more maintenance than ceramic or cultured marble. But if you're willing to put in that care, it pays off beautifully. Carrara Marble Vanity A Carrara marble vanity is one of the most sought-after looks in bathroom design right now. Carrara marble comes from Tuscany, Italy, and is known for its soft white or gray background with fine, feathery veining. It's classic, timeless, and works in everything from a modern spa bathroom to a traditional powder room. Like any natural stone, a carrara marble vanity should be sealed and treated with stone-safe cleaners. Avoid anything acidic - even citrus-based cleaners can etch the surface. But the aesthetic payoff is absolutely worth the care. Style Options to Match Any Bathroom One of the best things about integrated sink vanities is how many styles they come in. Whether you want something minimal and contemporary or something warm and traditional, there's an option for you. White Bathroom Vanity You really can't go wrong with a white bathroom vanity. White is clean, bright, and versatile - it works in small bathrooms where you want to maximize the feeling of space, and it works in large master baths where you want a crisp, spa-like aesthetic. A white bathroom vanity with an integrated sink looks especially polished because the seamless design highlights just how clean and minimal it is. There are no visual interruptions, no color variation from a separate basin - just one smooth, bright surface. Red Bathroom Vanity If you want to make a bold statement, a red bathroom vanity is one way to do it. Red vanities work especially well in powder rooms or guest bathrooms where you have more creative freedom. They're unexpected, eye-catching, and add real personality to a space. A red bathroom vanity with an integrated sink looks especially striking because the color reads as one strong, cohesive element - there's no break in the design where the sink meets the countertop. Wall Mounted Bathroom Vanity For a truly modern look, consider a wall-mounted bathroom vanity. These are installed directly to the wall with no legs or floor cabinet underneath, which creates a floating effect that makes the room feel bigger and more open. From a cleaning standpoint, a wall-mounted bathroom vanity is actually even easier to maintain than a floor-standing model - you can mop or sweep the floor all the way underneath it without having to work around cabinet legs or a base. Combine that with an integrated sink top and you've got one of the lowest-maintenance bathroom setups possible. Choosing From the Right Vanity Collections When you're shopping for a new vanity, browsing vanity collections from a trusted manufacturer makes the process a lot easier. Collections are designed so that different pieces - vanity cabinets, mirrors, light fixtures, hardware - all work together visually. Buying from coordinated vanity collections means you don't have to spend time trying to match styles and finishes across different brands. The work is already done for you, and everything arrives looking like it belongs together. Look for collections that offer integrated sink options as a standard feature, not an upgrade. The best collections will offer multiple countertop material choices - ceramic, cultured marble, or natural stone - so you can pick the look and performance that fits your needs. What to Look for in High-Quality Vanities Not all vanities are built the same, and it's worth knowing what separates a well-made piece from something that'll start looking beat up in a few years. When you're shopping for high-quality vanities, here's what to pay attention to: Construction: The cabinet box should be made from solid wood or moisture-resistant plywood - not particleboard, which swells and warps when it gets wet. Bathroom environments are humid, so the materials need to be able to handle that. Finish: Dovetail joints and soft-close hinges are signs of careful construction. The finish should be smooth and even, with no rough spots or drips. Sink material: As we covered above, the sink and countertop material make a big difference in how the vanity performs and how easy it is to maintain. High-quality vanities will clearly specify the material and thickness. Hardware: Look at the hinges, drawer glides, and handles. These are the things you'll use every day, so they should feel solid and move smoothly. Warranty: A manufacturer that stands behind their product will offer a meaningful warranty. If a company doesn't warrant their vanity, that tells you something. Installation Tips to Make the Most of Your New Vanity Once you've picked your integrated sink vanity, a good installation makes all the difference. A few things worth knowing: Level matters a lot. If the vanity isn't perfectly level, water won't drain properly and you'll end up with standing water in the sink or on the countertop. Take your time getting this right. Seal the backsplash joint. Even with an integrated sink, the joint where the vanity top meets the wall needs a thin bead of silicone caulk to prevent water from getting behind the unit. Use a mold-resistant silicone and keep it clean over time. Don't skip the shutoff valves. Install individual shutoff valves under the sink so you can turn off the water without going to the main shutoff. It makes future repairs or faucet replacements much easier. Give it breathing room. If you're installing a wall-mounted model, make sure the wall anchors are going into studs or that you're using proper toggle bolts rated for the weight. A wall-mounted vanity needs to be rock solid. Is an Integrated Sink Vanity Worth the Investment? Honestly? Yes - especially if you're someone who values a clean bathroom but hates spending your weekend scrubbing around a sink. The time savings are real. The lower maintenance requirements are real. And the way an integrated design looks - clean, seamless, cohesive - is genuinely better than the alternative. When you walk into a bathroom with a well-chosen integrated sink vanity, it just looks finished. Like someone actually thought about it. Whether you go with a simple ceramic vanity top for a guest bath, a statement Carrara marble vanity for a master suite, or a sleek wall-mounted bathroom vanity for a modern renovation, the one thing all these options have in common is that seamless sink-to-countertop design that makes cleaning so much easier. Final Thoughts Bathrooms are one of those spaces that can make or break your daily routine. A cluttered, hard-to-clean bathroom adds friction to your morning. A well-designed one with easy-to-maintain surfaces just gets out of your way. An integrated sink vanity is one of the simplest upgrades you can make to improve both the look and the function of your bathroom. It's not a gimmick - it's just good design that happens to save you real time every week. If you're renovating, even partially, it's worth putting an integrated vanity at the top of your list. Your future self - the one who isn't hunched over a sink with a toothbrush on a Saturday morning - will thank you.

Stop Bathroom Moisture From Rotting Your Vanity Collections
Let's be real - there's nothing worse than opening your bathroom cabinet one morning and noticing that your gorgeous furniture is starting to warp, smell musty, or show signs of rot. Moisture is the silent enemy of every bathroom, and if you've invested in beautiful vanity collections, you already know how frustrating it is to watch that investment slowly fall apart. The good news? You can absolutely stop this from happening. It just takes a little know-how and some smart choices when picking your materials, layout, and daily habits. In this guide, we're going to walk through everything - why moisture does so much damage, what materials hold up the best, and what you can do today to protect what you already have. Why Bathroom Moisture Is Such a Big Deal Bathrooms are basically humidity machines. Every hot shower pumps steam into the air. Every splash of water near the sink adds to the pool of moisture. Over time, that humidity seeps into wood, chipboard, and even some stone surfaces - and once it gets in, the damage starts quietly, usually before you even notice it. Wood swells and warps. Particleboard turns soft and crumbles. Paint peels. Hardware rusts. And worst of all, mold and mildew find a cozy home in all those damp corners. The problem isn't just cosmetic - moisture damage can compromise the structural integrity of your entire bathroom setup. This is why choosing the right materials from the start and taking care of what you've got makes such a massive difference. So let's talk about what actually works. Choosing the Right Materials: What Actually Holds Up in a Wet Environment Not all bathroom furniture and surfaces are built the same. Some materials are basically asking for trouble in a humid environment. Others are practically made for it. Here's what you need to know before you buy - or replace - anything in your bathroom. Go for a White Bathroom Vanity With Moisture-Resistant Finish A classic white bathroom vanity isn't just a style choice - it's actually a smart one. White finishes tend to use paint or lacquer formulas that seal the surface and resist humidity better than raw or lightly stained wood. More importantly, a white bathroom vanity makes water stains and mold growth easier to spot early, so you can deal with small problems before they turn into big ones. When you're shopping, look for vanities that specifically say moisture-resistant or waterproof-coated. Avoid anything made with low-grade MDF or raw wood unless it's been treated properly. Solid wood with a quality sealant can work, but you have to stay on top of maintenance. Consider a Cultured Marble Vanity for Long-Term Durability Here's a material that doesn't get nearly enough credit: cultured marble. A cultured marble vanity is made by mixing natural marble dust with resins to create a surface that's non-porous, seamless, and incredibly resistant to moisture. Unlike real stone, it doesn't need regular sealing, and it won't absorb water the way natural materials sometimes do. A cultured marble vanity is also much easier to clean - soap scum and hard water stains wipe right off with a mild cleaner. It looks polished and upscale, but the maintenance level is actually really low. For bathrooms that get heavy daily use, it's one of the smartest investments you can make. The Appeal of a Real Marble Vanity Top If you want the real deal, a marble vanity top brings a level of elegance that's hard to beat. Natural marble has been used in luxury spaces for centuries, and it still turns heads today. But here's the thing - natural marble is porous, and that means water can seep in if you're not careful. To protect your marble vanity top from moisture damage, you need to seal it at least once a year, sometimes more,e depending on how much use it gets. Use a penetrating stone sealer and wipe up standing water quickly. With the right care, marble can last for decades and still look stunning. Why a Wall-Mounted Bathroom Vanity Is a Game-Changer One of the smartest things you can do for moisture control is switch to a wall-mounted bathroom vanity. When your vanity floats off the floor, water that splashes or collects near the base has nowhere to pool against the wood. Traditional floor-standing vanities often trap moisture right at the base, which is usually where rot starts. A wall-mounted bathroom vanity also makes cleaning the floor underneath a breeze, which means less standing water and less overall humidity being absorbed by nearby surfaces. It looks modern and sleek too, so you get a win on both the practical and aesthetic front. High Quality Vanities Are Worth Every Penny - Here's Why We get it - bathroom renovations can be expensive, and it's tempting to go with a budget option. But when it comes to moisture resistance, high-quality vanities really do pay for themselves over time. Cheaper vanities are usually made with lower-grade materials, minimal sealing, and hardware that rusts quickly. You end up replacing them far sooner. High-quality vanities, on the other hand, are built with durable joinery, properly sealed finishes, and hardware that resists corrosion. They can handle the daily humidity of a busy bathroom without warping, peeling, or falling apart. Think of it this way: spending more upfront usually means spending less - and stressing less - over the next 10 to 15 years. When comparing options, look at the material specs, the quality of the finish, and the type of hardware used. Soft-close hinges, dovetail drawer joints, and plywood (rather than particleboard) construction are all signs you're looking at something built to last. Carrara Marble Vanity: Beauty That Needs a Little Extra Love Few materials in the world are as beautiful as Carrara marble. That soft white background with delicate grey veining has been the gold standard in luxury design for centuries. A Carrara marble vanity immediately elevates the look of any bathroom - but like all natural stone, it comes with some responsibilities. A Carrara marble vanity is susceptible to etching from acidic products (think toothpaste, some cleaners, even lemon juice) and to staining from moisture that isn't wiped up quickly. To keep it looking its best, seal it regularly and use only pH-neutral cleaners. Keep a small hand towel near the sink so family members can quickly wipe up splashes. The maintenance might sound like a lot, but many homeowners find that it becomes second nature pretty fast. And honestly, the look you get in return is completely worth it. Make a Statement With a Red Bathroom Vanity (Without Sacrificing Function) Not everyone wants a neutral bathroom. If you're drawn to bold, personality-driven design, a red bathroom vanity is one of the most striking choices you can make. Deep cherry finishes, lacquered crimson, or even a bold barn-red stain - there's something undeniably dramatic about a red vanity that makes a bathroom feel like a design statement rather than just a utility room. But here's the thing with colored vanities: the finish has to be done right, or moisture will find its way under the paint and cause peeling. A red bathroom vanity should be finished with a top-quality lacquer or conversion varnish that creates a hard, water-resistant shell. Avoid water-based paints in high-humidity environments unless they're specifically rated for bathrooms. Touch up any chips or scratches right away. Once moisture gets under the finish at a weak point, it spreads quickly. With proper care, a boldly colored vanity can stay vibrant and beautiful for years. Ceramic Vanity Top: Tough, Easy to Clean, and Budget-Friendly If you want a surface that's virtually impervious to moisture without the higher price tag of natural stone, a ceramic vanity top is a fantastic option. Ceramic is non-porous by nature, which means water sits on the surface rather than soaking in. It's also resistant to most stains, scratches, and the everyday wear and tear a bathroom gets. A ceramic vanity top is easy to clean - just wipe it down with a mild cleaner, and you're done. It holds up beautifully in high-humidity environments, doesn't need sealing, and comes in a wide range of colors and styles. For families with kids or in bathrooms that see a lot of daily use, it's honestly one of the most practical choices out there. The one thing to watch with ceramic is the grout lines, if your countertop has them. Grout can absorb moisture and harbor mold. Use an epoxy grout or apply a grout sealer annually to keep things clean and dry. Why an Integrated Sink Vanity Cuts Down on Moisture Problems One of the most underrated upgrades you can make in a bathroom? Switching to an integrated sink vanity. When the sink and countertop are one seamless piece, there are no gaps or seams around the basin where water can collect and seep down into the cabinet below. Traditional drop-in or undermount sinks leave edges and joints that eventually become moisture entry points,s no matter how well they're sealed. An integrated sink vanity eliminates that problem. The whole surface is one continuous piece - usually made from porcelain, cultured marble, or solid surface material. Cleaning is easier too, since there are no edges to scrub around. It's a cleaner look that's also a smarter one when it comes to protecting your cabinetry from water damage. Daily Habits That Make a Huge Difference Even the best materials in the world can't fully protect against moisture if your daily habits are working against you. Here are some simple things you can do every day to keep your bathroom dry and your vanity in top shape. Run the exhaust fan during and after every shower. Most people don't run it long enough. Keep it on for at least 15 to 20 minutes after you finish to clear the steam from the air. Wipe down wet surfaces. A quick wipe of the countertop after washing your hands or brushing your teeth takes about 10 seconds and prevents water from pooling near the base of the faucet or along the backsplash. Check under the sink regularly. Slow pipe leaks and drips are sneaky. A quick peek every few weeks can catch a problem early before it soaks into the cabinet floor. Leave cabinet doors open occasionally. This lets air circulate under the sink and helps dry out any humidity that builds up inside. Consider a small bathroom dehumidifier. In climates that are naturally humid, or in bathrooms without windows, a compact dehumidifier can work wonders. Protecting What You Already Have Maybe you're not ready to replace anything yet - you just want to protect what's already in your bathroom. That's totally valid, and there's a lot you can do. Start with a thorough inspection. Look for soft spots in the cabinet wood, discoloration, peeling finishes, or any gaps in caulk around the sink or countertop edges. Recaulk any gaps you find. Old, cracked caulk is one of the most common entry points for water. Peeling caulk around the sink is basically a welcome mat for moisture. Remove the old caulk completely, dry the surface thoroughly, and apply a fresh bead of 100% silicone caulk. It's a cheap fix that makes a huge difference. If your wood cabinet is still in decent shape but showing early signs of moisture wear, consider applying a coat of polyurethane or a bathroom-grade wood sealant to the exterior. It adds a layer of protection that buys you more time. Final Thoughts: A Little Prevention Goes a Long Way Your bathroom doesn't have to be a war zone between moisture and your furniture. With the right materials, a few smart design choices, and some simple daily habits, you can keep your bathroom looking great for years without the stress of constant repairs. Whether you're building from scratch, doing a renovation, or just trying to take better care of what you have, the key takeaway is this: moisture management starts with awareness. Once you understand how and where water is getting in, you can stop it before it does real damage. The bathroom is one of the most-used spaces in your home. It deserves quality materials, thoughtful design, and a little bit of ongoing attention. And when you get it right, it's one of the most satisfying rooms in the house to walk into every single morning.

What Is a Defogging Mirror and Do You Actually Need One?
If you've ever stepped out of a hot shower and reached for the mirror - only to find it completely fogged up - you already know the struggle. You're wiping it down with a towel, maybe using your hand, and still waiting a few minutes just to see your own face. It's one of those small, everyday annoyances that add up fast. That's exactly where a defogging mirror comes in. And if you haven't heard of one yet, this guide breaks down everything you need to know - what it is, how it works, and whether it's actually worth putting in your bathroom. So, What Exactly Is a Defogging Mirror? A defogging mirror is a bathroom mirror that has a built-in heating element behind the glass. That element warms up the mirror surface just enough to prevent condensation from forming on it. The result? A clear, fog-free mirror even while you're still in a steamy shower. The technology is pretty straightforward. When water vapor hits a cold surface, it turns into tiny water droplets - that's your fog. A defogging mirror keeps the surface warm, so the vapor doesn't have a chance to settle. Think of it like the rear defroster on your car's back window, but for your bathroom. Most models have a small pad or a heating film bonded to the back of the mirror. You connect it to your bathroom's electrical wiring, and once it's on, it quietly does its job every time you need it. How Is It Different from a Regular Bathroom Mirror? A standard mirror does nothing to fight fog. You're relying on ventilation fans, open windows, or just waiting it out. A heated bathroom mirror, on the other hand, tackles the problem at the source. Some mirrors just have the heating element. Others go further - combining the defogging feature with LED lighting, smart controls, or storage. These days, a lot of homeowners are choosing mirrors that bundle everything together. For example, a lighted vanity mirror with built-in defogging gives you great visibility right when you get out of the shower. You're not squinting through steam or waiting around. That combination has made these mirrors really popular in master bathrooms and new builds. The Different Types You'll Find Not all bathroom mirrors with defogging are the same. Here's what's out there: LED Bathroom Mirror The most common upgrade people make is switching to an LED bathroom mirror. These mirrors come with light strips built into the edges or the frame. Many of them also include a defogging pad as a bonus feature. The LED lighting is cooler and more energy-efficient than old-school bulbs. It also gives off a cleaner, more even light - which is actually helpful when you're doing things like applying makeup or shaving. An LED bathroom mirror with defogging is a solid choice if you want better lighting and a fog-free surface without over-complicating your bathroom setup. Lighted Mirror A lighted mirror is similar to an LED model, but the term covers a broader range - including mirrors with warm-toned lighting, backlit designs, or lights positioned along just one edge. Many lighted mirrors today also include touch-sensor dimmers, so you can adjust brightness based on the time of day. The defogging feature on a lighted mirror is usually activated with the same switch or button as the lights, making it easy to use. Heated Bathroom Mirror A heated bathroom mirror emphasizes the heating element. Some people specifically look for this type when they've had long-term fog problems or when their bathroom has poor ventilation. These mirrors are available in frameless styles, black-framed modern designs, and everything in between. A good heated bathroom mirror stays warm enough to stay clear without getting hot enough to be uncomfortable - the surface is warm to the touch, not burning. LED Medicine Cabinet If storage is a priority, an LED medicine cabinet might be the way to go. These are recessed or surface-mounted cabinets with mirrored doors that include built-in LED lighting and, in many models, a defogging element as well. You're getting a mirror, storage, good lighting, and fog prevention all in one unit. For smaller bathrooms where counter space is limited, an LED medicine cabinet makes a lot of practical sense. Recessed Mirror Cabinet A recessed mirror cabinet fits into the wall cavity rather than sitting on the surface. It's a cleaner look - the cabinet doesn't stick out, and the bathroom feels less cluttered. Many of these also come with defogging and lighting built in. Installing a recessed mirror cabinet takes a bit more work upfront (you need to cut into the drywall), but the finished result tends to look a lot more polished than a surface-mounted option. Do You Actually Need One? Here's the honest answer: it depends on your bathroom and your habits. You probably need a defogging mirror if: Your bathroom doesn't have great ventilation You take long, hot showers You're always wiping down the mirror before you can use it You're remodeling and want a cleaner, more functional setup Multiple people share the bathroom, and it stays steamy for a while You might not need one if: Your bathroom has a strong exhaust fan that clears fog quickly You usually take shorter or cooler showers You're working with a tight budget and don't mind the wait That said, once people start using a mirror with defogging, they rarely want to go back. It's one of those upgrades that seems small until you're actually using it every morning. What Should You Look for When Buying One? If you've decided to make the switch, here's what to pay attention to: Size and placement - Measure your wall space before you shop. A mirror that's too small or too large for your vanity area will look off. Also consider whether you want a mirror that sits above a double sink or just a single. Lighting color temperature - LED lighting comes in warm white (soft, yellowish) and cool white (crisp, daylight-style). Cool white tends to be more accurate for grooming tasks, while warm white feels more relaxing. Some lighted vanity mirrors let you switch between both. Touch controls vs. wall switches - Many modern mirrors come with touch-sensitive pads built into the glass, so you can turn on the defogging feature or adjust the lights with a tap. Others are wired to a wall switch. Either works, but touch controls feel more seamless. Storage needs - If you're tight on counter space, seriously consider an LED medicine cabinet or recessed mirror cabinet. You'd be surprised how much easier mornings get when everything has a place. Certifications and safety ratings - Because these mirrors involve electricity near water, look for UL-listed products or those that meet similar safety standards. Don't skip this part. Installation: Is It a DIY Job? For most defogging mirrors, you'll need to connect the heating element and any lighting to your bathroom's electrical system. If you're handy and comfortable with basic wiring, some models are designed to be DIY-friendly. But honestly, for anything involving electrical work in a bathroom - especially a recessed mirror cabinet or an LED bathroom mirror wired into the wall - it's worth hiring a licensed electrician. The cost is usually reasonable, and you're not risking a safety issue down the road. If you're already doing a full bathroom remodel, just include the mirror in your project and have your contractor handle it. How Much Do They Cost? The price range is pretty wide. Here's a rough breakdown: Basic defogging mirrors with LED lighting - $80 to $200 Lighted vanity mirrors with touch controls - $150 to $400 Heated bathroom mirrors (premium, frameless) - $200 to $600 LED medicine cabinets with defogging - $150 to $500 Recessed mirror cabinets (high-end) - $300 to $800+ Mid-range options in the $150 to $300 range tend to hit the sweet spot for most people - solid quality, good features, without going overboard. Caring for Your Defogging Mirror Taking care of one of these mirrors is pretty simple. Use a non-abrasive glass cleaner and a microfiber cloth. Avoid spraying cleaner directly onto any touch sensors or light strips. Don't use harsh chemicals like ammonia-based cleaners - they can damage the coating on some LED bathroom mirrors over time. The heating element itself is sealed behind the glass and doesn't need any maintenance. Most last for many years without issues. Final Thoughts A defogging mirror isn't just a luxury bathroom feature anymore - it's become a practical, affordable upgrade that solves a real daily problem. Whether you go with a simple heated bathroom mirror, a feature-packed lighted vanity mirror, a storage-friendly LED medicine cabinet, or a sleek recessed mirror cabinet, you're investing in a better morning routine. You won't miss wiping down a foggy mirror every day. And once you've got a clear reflection waiting for you right when you step out of the shower, it just makes the whole experience feel a little more put-together. If you're renovating your bathroom or just tired of dealing with fog, it's worth taking a closer look at what's out there. The options have gotten really good, and the prices have come down a lot in the last few years.

Mother's Day 2026: Wellness Bath Upgrade She Deserves
Mother's Day 2026 is almost here, and if you're still thinking about flowers or a gift card, let's have a real conversation. Moms do a lot. Like, a lot a lot. They're up before everyone else, they're the last ones to sleep, and somewhere in between, they quietly put everyone else's comfort ahead of their own. So this year, why not give her something that actually lasts - a bathroom experience that feels like a five-star retreat every single morning? That's the idea behind the "Wellness Bath" trend that's been picking up serious steam heading into mother's day 2026. It's not about a fancy candle or a bath bomb set (though those are cute). It's about transforming the bathroom into a real space for rest, recovery, and a little daily luxury. And companies like Dreamwerks - a trusted name in bathroom furnishing and accessories - are making that easier and more affordable than ever. Why the Bathroom Has Become the New Sanctuary Think about it. Where does mom go when she finally gets five minutes to herself? The bathroom. It's often the only room in the house with a lock on the door. For a long time, bathrooms were purely functional. You get in, you get out. But that thinking is changing fast. People are investing in their bathrooms the same way they invest in their living rooms or kitchens - because the space you start and end your day in matters. The "Wellness Bath" movement is built on that idea. It combines smart design, quality materials, and thoughtful accessories to turn a regular bathroom into something that actually supports your mental and physical health. And with Mother's day gifts trending toward experiences over things, a bathroom upgrade checks every box: personal, lasting, and genuinely useful. What Makes a Wellness Bath? (And How Dreamwerks Delivers It) Here's the thing - you don't need to gut-renovate the entire bathroom to create a wellness experience. A few smart upgrades, chosen well, can completely change the feel of a space. Dreamwerks specializes in exactly that: high-quality bathroom accessories and furnishings that bring a polished, spa-like look without the contractor headaches. Let's break down what goes into a real wellness bath - and what Dreamwerks brings to the table. 1. A Bathtub Worth Soaking In You want to talk about mother's day gift ideas that actually land? Start with the bathtub. Not all bathtubs are created equal. A lot of the standard tubs out there are fine, but they're not exactly inviting. Dreamwerks carries a line of luxury bathtubs designed with comfort as the priority - deeper soaking depths, ergonomic back support, and clean modern lines that instantly elevate any bathroom. Whether Mom prefers a freestanding soaking tub that becomes the centerpiece of the room or a built-in design that makes smarter use of space, the options Dreamwerks offers are genuinely impressive. The materials are built to retain heat longer, so a soak actually stays warm. Little details like that make a huge difference. If you're looking for the best bathtub option for a home upgrade, Dreamwerks is a solid place to start - especially if you want something that looks like it belongs in a boutique hotel but works for everyday real life. 2. A Shower That Actually Feels Good Not everyone is a bath person, and that's totally fine. A lot of moms prefer a quick, powerful shower - but that doesn't mean the experience can't be elevated. A quality shower kit changes everything. Dreamwerks offers thoughtfully designed shower kits that go beyond the basic showerhead-and-handle setup. We're talking rainfall heads, handheld options, adjustable pressure settings, and clean hardware finishes that tie the whole bathroom together. A well-designed shower kit is one of those upgrades people don't realize they needed until they have it. Once you've stood under a proper rainfall shower, the old low-pressure head just doesn't cut it anymore. For moms who treat their morning shower as their quiet time before the day kicks off, this is an upgrade that genuinely improves daily life. 3. Vanity Tops That Pull the Room Together Here's something a lot of people overlook: the vanity. It's where Mom starts her morning and ends her night. It's where she gets ready, winds down, and takes stock of the day. And yet, so many bathrooms have vanity areas that feel cluttered, dated, or just kind of blah. Dreamwerks carries a range of vanity tops that are both functional and beautiful. Clean stone surfaces, thoughtful sink placements, and finishes that hold up to daily use without looking worn after six months. A good vanity top doesn't just look nice - it makes the whole getting-ready routine feel smoother. Vanity tops from Dreamwerks come in styles that work across different bathroom aesthetics, from modern minimalist to warm and classic. It's one of those upgrades that makes people walk into a bathroom and immediately think, " Wow, this feels different in here - even if they can't quite put their finger on why. Building the Full Wellness Bath Experience Okay, so now you've got the major pieces: a beautiful soaking tub, an upgraded shower, and a vanity that actually inspires you in the morning. But a true wellness bath is also about the details. Here's what rounds out the experience: Lighting. Soft, layered lighting does more for a bathroom than almost anything else. Dreamwerks accessories pair beautifully with warm-toned lighting setups that make the whole space feel warmer and more intentional. Storage. A cluttered bathroom kills the spa vibe immediately. Smart storage solutions - clean shelving, built-in niches, organized under-sink space - let the beautiful surfaces breathe. Texture and warmth. Plush towels, a quality bath mat, maybe a small teak stool near the tub. These are small additions, but they signal to your brain that this is a place to slow down. Scent. A diffuser with calming essential oils, or even a simple candle, anchors the sensory experience. Lavender, eucalyptus, and bergamot are classics for a reason. Put it all together, and you've created something that genuinely supports wellbeing - not just a functional bathroom, but a restorative one. Why This Is the Perfect Mother's Day 2026 Gift There's a reason Mother's day 2026 is shaping up to be the year of the home wellness gift. People are more aware than ever of the connection between your environment and their mental health. We spend more time at home. We're more intentional about how our spaces make us feel. And moms - who often pour so much energy into making everyone else comfortable - deserve a space that's been thoughtfully designed for their comfort. A bathroom upgrade through Dreamwerks isn't just a practical gift. It's a message: I see how hard you work. I want you to have somewhere beautiful to come home to. The best bathtub for your mom isn't necessarily the most expensive one - it's the one that fits her space, her style, and how she actually uses it. That's why Dreamwerks offers options across different sizes, styles, and price points. Their team understands that every home is different, and they're set up to help you find what actually works. A Gift That Keeps Giving - Every Single Morning Here's the thing about Mother's day gifts that are experiences or upgrades: they don't end on Mother's Day. Every morning when Mom walks into her bathroom and stands under that rainfall showerhead, or settles into a deep soak after a long week, or catches herself smiling at how clean and put-together her vanity looks - she'll feel it again. That's the real value. Not just a nice gesture on one Sunday in May, but a daily experience that reminds her she's worth investing in. Dreamwerks makes that possible. From luxury bathtubs to complete shower kit setups to those finishing vanity tops that pull everything together - they carry the pieces that turn a bathroom into a real retreat. How to Get Started If you're planning a bathroom upgrade as a Mother's day gift idea project, here's a simple approach: Start by thinking about what Mom actually uses most. Is she a bath person or a shower person? Does her vanity area feel cramped or outdated? Is there one thing about her current bathroom that she's always wanted to change? From there, Dreamwerks is a great place to browse. Their range of bathroom furnishings covers everything from statement pieces like freestanding tubs to the smaller details that complete the look. And because they focus on quality materials and thoughtful design, you're not just buying something that looks good on day one - you're buying something that holds up. This Mother's day 2026, skip the temporary and go for something that genuinely improves her daily life. A wellness bath isn't just a trend. It's a real, tangible way to say thank you - in a language she'll hear every single day.
Recessed vs. Surface Mount Medicine Cabinets: Which is Best?
If you've been staring at your bathroom wall trying to figure out what kind of medicine cabinet to get, you're not alone. This is one of those decisions that feels simple on the surface (no pun intended) but actually has a lot of layers to it. Should you go with a surface mount medicine cabinet or a recessed one? What's the real difference? Which one works best for your bathroom? Let's break it all down in plain English - no jargon, no fluff - just the honest stuff you need to make a smart choice. What Even Is a Surface Mount Medicine Cabinet? A surface mount medicine cabinet is exactly what it sounds like. It mounts directly onto the wall without cutting into the drywall or studs. You hang it, you bolt it, and it sticks out from the wall by a few inches. Simple, clean, done. These cabinets come in tons of styles - with mirrors, without mirrors, with lights, without lights. They work for pretty much any bathroom, whether you're dealing with a tight corner in a small bathroom or a wide open wall in a master bath. The biggest thing to know: installation is way easier with a surface mount than with a recessed cabinet. You don't need to worry about what's inside the wall; no cutting is required, and most people can hang one themselves in under an hour. And What About a Recessed Medicine Cabinet? A recessed medicine cabinet sits inside the wall. You cut a hole in the drywall, slide the cabinet in, and it sits flush with the surface. The result looks really sleek and built-in - like it was always meant to be there. If you're going for a clean, minimalist look in your bathroom, a recessed cabinet is tough to beat. The downside? Installation is more involved. You've got to check for insulation, electrical wiring, plumbing, and studs before you start cutting. In some bathrooms - especially ones with insulated exterior walls or walls packed with pipes - a recessed cabinet just isn't an option. Most homeowners who go the recessed route hire a contractor, especially if it's their first time doing it. Recessed vs Surface Mount Medicine Cabinet: The Real Comparison When you're weighing a recessed vs surface mount medicine cabinet, there are a few things you really need to think about: 1. Your Wall Type This is the first question to ask. Do you know what's inside your bathroom wall? If you've got a thin interior wall with empty space between studs, a recessed cabinet might work great. But if you've got an exterior wall, tile, or concrete behind the drywall, a surface mount is your friend. 2. Installation Difficulty Surface mount wins this round, hands down. You don't need any special tools or wall knowledge. Most come with basic hardware and can be hung in the same afternoon you bring them home. A recessed installation takes planning. You'll need to measure twice (or ten times), check for hidden hazards in the wall, and possibly patch drywall if things go sideways. 3. How Much Space You're Working With This one matters a lot, especially if you've got a smaller bathroom. A surface-mount cabinet sticks out from the wall, which means it takes up some of your floor-adjacent space. In a tight bathroom, this can feel like the cabinet is crowding you. A recessed cabinet doesn't eat into the room at all. It sits flush, so it's perfect for small bathroom vanity areas where every inch counts. 4. Storage Depth Here's something most people don't think about until it's too late: recessed cabinets are typically shallower because they're limited by the wall depth (usually 3.5 to 4 inches). Surface-mount cabinets can be made deeper, which means more room for bulkier items like hairspray, bottles, and first aid supplies. If you need serious storage, a surface mount might actually give you more room to work with. Bathroom Storage Solutions: Thinking Beyond the Cabinet Whether you go recessed or surface mount, your medicine cabinet is just one piece of the puzzle when it comes to bathroom storage solutions. Most bathrooms need more than one spot to stash stuff. Here are some things worth thinking about alongside your cabinet choice: Floating shelves - Great for towels, candles, or decorative items. They don't take up floor space and look really modern. Under-sink organizers - If you've got a vanity with cabinet doors underneath, that space is gold. Stackable bins and pull-out drawers make it way more useful. Drawer dividers - The small stuff (cotton swabs, hair ties, nail clippers) tends to take over. Dividers keep things from becoming a tangled mess. Over-toilet shelving - One of the most underused spots in any bathroom. A simple shelf unit above the toilet can hold extra toilet paper, towels, and more without taking up floor space. These bathroom storage ideas work alongside your medicine cabinet to create a system that actually keeps your bathroom feeling organized, not cluttered. Shower Storage Ideas That Work With Your Bathroom Setup While we're talking storage, let's not forget the shower. A lot of people focus on medicine cabinets and ignore what's happening inside the actual shower - and then end up with a lineup of bottles on the floor or a crammed corner caddy that falls down every other day. Here are some shower storage ideas worth considering: Built-in shower niches - These are recessed shelves inside the shower wall. Same concept as a recessed medicine cabinet - they sit flush and look clean. Great for shampoo, conditioner, and body wash. Corner shelves - Easy to install, affordable, and they make use of space that's usually wasted. Tension pole caddies - No drilling, no installation. These stand between the floor and the ceiling of your shower. Good for renters or anyone who doesn't want to touch the tile. Magnetic strips - Sounds weird for a shower, but waterproof magnetic strips can hold metal razor handles and other tools right on the wall. Getting your shower storage sorted out means your medicine cabinet doesn't have to do all the heavy lifting. When everything has a place, the whole bathroom just feels better. Medicine Cabinet With Mirror: Do You Need One? Almost every medicine cabinet these days comes with a mirror on the front. And honestly, that's one of the biggest selling points. You get storage and a mirror in one, which saves wall space you'd otherwise use for a separate mirror. A medicine cabinet with mirror is especially practical if your bathroom has limited wall space or only one light source. You can position the cabinet right where you need it - above the sink, at eye level - and the mirror works perfectly for morning routines. Some models even come with built-in lighting around the mirror, which is a nice bonus if your bathroom lighting isn't great. These lit mirrors are huge right now in bathroom design, and they make a real difference when you're trying to do makeup or shave. Recessed Medicine Cabinet With Mirror: Best of Both Worlds? If you want the clean, built-in look AND a functional mirror, a recessed medicine cabinet with a mirror is a solid pick. You get the flush wall profile, the hidden storage, and the mirror - all in one unit. These are especially popular in modern and contemporary bathrooms where the design goal is to keep things minimal and streamlined. No extra frames, no bulky protrusions, just a smooth mirror that opens up to reveal everything you need. The tradeoff, again, is installation. You've got to be prepared to cut into the wall and deal with whatever's back there. But if you're already doing a bathroom renovation, this is a great time to get it done right. How This Fits Into Your Overall Vanity Setup Your medicine cabinet doesn't exist in a vacuum. It's part of your whole vanity setup, and the right choice depends on what else you've got going on in the bathroom. If you're working with a floating vanity - one of those wall-mounted designs with no legs - you already know the look you're going for: clean, modern, airy. A recessed medicine cabinet or a surface mount with a slim profile will complement that aesthetic much better than a big chunky cabinet. Floating vanity tops are also trending right now, and they pair really well with recessed cabinets because both give you that built-in, custom feel. The whole bathroom ends up looking cohesive, like it was designed on purpose rather than thrown together piece by piece. If you're going more traditional with your vanity, a surface-mount medicine cabinet with a framed mirror can look really sharp and intentional. Small Bathroom? Here's What to Focus On For anyone working with a small bathroom, storage decisions feel even more high-stakes. You've got less room to experiment, so you want to get it right the first time. Here's the honest truth about small bathroom vanities and medicine cabinets in tight spaces: If your wall allows it, a recessed cabinet is better because it doesn't eat into your space. If recessed isn't possible, choose a surface mount that's as shallow as possible. Go tall rather than wide if you can - a taller cabinet gives you more storage without taking up more wall width. A mirrored cabinet does double duty and eliminates the need for a separate mirror. And don't forget vertical space. Most people in small bathrooms focus so much on the vanity and medicine cabinet that they ignore everything above eye level. Tall storage towers, stacked shelves, and hooks on the back of the door can dramatically increase your usable storage without touching a single wall stud. What to Look for When Shopping Whether you end up going surface mount or recessed, here's a quick checklist of things to look at when you're shopping: Size - Measure your wall space before you go anywhere near a store or website. Know your width, height, and depth limits. Number of shelves - More shelves with adjustable heights give you flexibility as your storage needs change. Mirror quality - If it comes with a mirror, check the thickness and whether it's anti-fog. A cheap mirror in a humid bathroom fogs constantly. Soft-close hinges - Small thing, big quality-of-life upgrade. No slamming doors at 6 am. Finish - Brushed nickel, matte black, chrome - pick something that matches your faucets and other fixtures so the bathroom looks pulled together. Lighting - If you want built-in lights, make sure you've got an outlet nearby or plan for electrical work. Final Verdict: Which One Should You Get? Here's the short version: Get a recessed medicine cabinet if: Your wall allows it (interior wall, no insulation or pipes) You want a clean, flush look You're doing a full bathroom renovation anyway Space is tight, and you don't want anything sticking out Get a surface-mount medicine cabinet if: You want an easy, DIY-friendly installation Your wall isn't suitable for cutting (tile, exterior wall, concrete) You need deeper storage You're renting or don't want permanent wall changes At the end of the day, both types work well. The best one for you is the one that actually fits your bathroom, your budget, and your lifestyle. Don't overthink it - pick the one that solves your specific problem, and then use the tips in this post to fill in the rest of your storage needs around it. A well-organized bathroom doesn't have to be complicated. It just has to work for you.

Do You Need an Electrician for a Lighted Medicine Cabinet
So you just picked out a beautiful lighted medicine cabinet for your bathroom and now you're staring at it, wondering - do I need to call an electrician for this, or can I handle it myself? Totally fair question. And honestly, the answer depends on a few things. Let's break it all down so you can make a smart decision before you pick up a screwdriver - or a phone. What Is a Lighted Medicine Cabinet, Anyway? A lighted medicine cabinet is basically a two-in-one - you get storage space behind a mirror, plus built-in lighting around or inside the cabinet. Most of them run on electricity, which is why people start wondering whether they need professional help. Some models plug directly into an outlet. Others are hardwired, meaning they connect straight into your home's electrical system with no plug involved. That difference right there is what determines how complicated the installation gets. When You Probably Don't Need an Electrician If your new bathroom mirror cabinet with lights is a plug-in model, and there's already an outlet nearby in your bathroom, you're likely in good shape to DIY this. Here's why: The medicine cabinet installation itself - mounting the cabinet to the wall - is pretty straightforward for most homeowners. You'd be dealing with basic carpentry stuff: finding studs, drilling, and securing the cabinet in place. No electrical work needed beyond plugging it in. The same goes for surface-mounted cabinets. They sit on the wall instead of inside it, so you skip all the wall-cutting headaches. As long as you're mounting it at the right height and there's a nearby outlet, you can likely do it yourself on a weekend afternoon. When You Should Definitely Call an Electrician Here's where things get real. If your cabinet is hardwired - and a lot of the nicer models are - you're going to need someone licensed to handle the wiring. In most states, connecting directly to your home's electrical system without a permit or proper license is illegal. It can also void your homeowner's insurance if something goes wrong. Beyond legality, bathrooms are wet environments. The combination of water and electricity is no joke. A licensed electrician knows how to handle GFCI outlets, proper circuit protection, and moisture-rated wiring - things that directly protect your family. So if your mirrored cabinet with lights needs to be hardwired, don't risk it. Hire a pro. What About Recessed vs. Surface Mount? This matters a lot during bathroom cabinet installation. Here's the quick breakdown: Surface Mount Cabinets - These attach directly to the wall. Easier to install, less disruption, and great for bathrooms where you can't or don't want to cut into the wall. Still need to secure into the studs properly. Recessed Cabinets - These go inside the wall, giving you a flush, built-in look. Way more work. You'll need to cut an opening, check for studs and plumbing, and potentially deal with wiring inside the wall. If you go recessed AND hardwired, you really should have a professional involved. Getting the Medicine Cabinet Mounting Height Right A super common mistake people make is hanging the cabinet too high or too low. The standard rule of thumb for medicine cabinet mounting height is to center the mirror portion at eye level - for most adults, that's around 60 to 65 inches from the floor to the center of the cabinet. If multiple people of different heights use the same bathroom, aim for somewhere in the middle. Also, account for the countertop height - you don't want to be craning your neck every morning just to see your reflection. For kids' bathrooms, you can go a bit lower, obviously. Just think about who's actually using the space every day. Understanding Standard Medicine Cabinet Sizes Before you even start the installation, make sure your cabinet fits your wall space. Standard medicine cabinet sizes typically range from about 14 inches wide up to 30 inches or more. The most common sizes you'll see are: • 14" x 18" - Good for small powder rooms • 16" x 26" - Very popular, fits most single-sink vanities • 24" x 30" - Works well for larger vanities • 30" x 30" - Great for double vanities or wide bathroom walls Measure your wall space carefully, especially if you're going recessed. You need to make sure there's no plumbing or electrical running through the area where you plan to cut. Steps for a Basic Bathroom Medicine Cabinet Installation If you've confirmed you have a plug-in model and you're comfortable with basic home improvement tasks, here's a general idea of what bathroom medicine cabinet installation looks like: Step 1: Pick your location. Think about the mounting height, proximity to the sink, and whether you're going with a surface or recessed. Step 2: Find your studs. Use a stud finder. This is non-negotiable if you want the cabinet to actually stay on the wall. Step 3: Mark your mounting points. Use a level. A crooked cabinet is going to bug you every single day. Step 4: Drill and mount. Follow the manufacturer's instructions. Most cabinets come with a template or mounting hardware. Step 5: Connect the light. Plug it in, or if hardwired - call your electrician at this point if you haven't already. Step 6: Check it. Open and close the door, check the mirror, test the lights. How Much Does It Cost to Hire an Electrician? If you do need electrical work done, here's a rough idea of what to expect. Most electricians charge between $50 and $100 per hour. For a straightforward hardwired bathroom mirror cabinet with lights, you're probably looking at one to three hours of work, depending on your home's setup. If you need a new circuit run or a GFCI outlet added, that can add to the cost. Get a quote upfront so there are no surprises. Tips for Choosing the Right Lighted Medicine Cabinet Not all cabinets are created equal. Here's what to look for when you're shopping: Lighting type matters. LED lighting is the way to go. It lasts longer, uses less energy, and gives off a clean, bright light that's great for getting ready in the morning. Check the IP rating. This tells you how moisture-resistant the cabinet is. For bathrooms, look for at least IP44 or higher. Think about storage. A mirrored cabinet with lights that looks amazing but has zero shelf space inside isn't going to help you much. Look for adjustable shelves. Consider the door style. Single door, double door, mirrored on both sides - all options exist. Pick what makes sense for your space and how you use it. Common Mistakes to Avoid Here are a few things people get wrong when doing medicine cabinet installation on their own: Skipping the level. Eyeballing it never works. Always use a level. Not checking for pipes or wiring inside the wall. Especially important for recessed installs. Use a stud finder that also detects wiring and pipes, or get a professional opinion first. Ignoring the weight limit. A cabinet full of toiletries can get heavy. Make sure you're mounting into studs, not just drywall. Forgetting about the outlet location. If your plug-in model's cord is short, you might end up with the cord hanging visibly down the wall. Plan ahead. Final Verdict: Do You Need an Electrician? Here's the simple version: If your lighted medicine cabinet is a plug-in model and you're comfortable with basic DIY - go for it. Take your time, use a level, find your studs, and follow the instructions. If it's hardwired - hire a licensed electrician. It's worth every penny for the safety and peace of mind. And if you're doing a recessed installation in an older home where you're not sure what's inside the walls - even for a plug-in model, it doesn't hurt to get a professional to at least check things out before you start cutting. A well-installed bathroom mirror cabinet with lights can completely transform the feel of your bathroom. It's one of those upgrades that looks expensive but doesn't have to be - as long as you do it right the first time.

Maintenance Guide to Keep Your Vanity Top Looking Brand New
Let's be honest - your bathroom deserves better than a dull, scratched-up surface. Your vanity top is one of the first things you (and your guests) see every single day. Whether you've invested in gorgeous marble vanity tops, sleek quartz vanity tops, or something in between, keeping them looking fresh doesn't have to be a chore. The truth is, most people don't realize how simple it is to protect their bathroom surfaces - until they've already let things slide. Soap scum builds up, water stains set in, and before long, that beautiful countertop looks like it belongs in a rental property from the '90s. So here's your no-fluff, easy-to-follow guide to keeping your vanity top looking brand new, no matter what material it's made of. Why Your Vanity Top Deserves Some TLC Think about everything your bathroom countertop goes through on a daily basis. Toothpaste splatter, makeup spills, hair products, damp towels piled on top - it's a lot. And depending on what material you went with, each surface has its own set of needs. Choosing from the best bathroom vanity material options is just step one. Step two - and honestly, the more important one - is knowing how to care for whatever you picked. A $3,000 marble surface that's been neglected will look worse than a $300 basic top that's been loved and maintained properly. Let's break this down by material, since that's where it really matters. Caring for Marble Vanity Tops Marble is stunning - no question about it. It's one of those materials that adds instant elegance to any space, which is why marble vanity tops remain a top pick for homeowners who want that classic, luxurious feel. But marble is also one of the most high-maintenance materials out there, so you've got to handle it with care. The Cardinal Rule: No Acid Marble is a calcium-based stone, which means it reacts badly to anything acidic. That includes vinegar, lemon juice, most bathroom cleaners, and even some hand soaps. When acid hits marble, it etches the surface - leaving behind dull, rough spots that are nearly impossible to fix without professional polishing. Stick to pH-neutral cleaners specifically formulated for natural stone. A simple mix of warm water and a few drops of dish soap works great for everyday cleaning. Wipe it down with a soft microfiber cloth and dry it immediately - standing water is marble's enemy. Sealing Is Non-Negotiable Marble is porous, which means liquids seep in and cause staining if you're not careful. Sealing your marble vanity about once or twice a year creates a protective barrier that gives you extra time to wipe up spills before they soak in. Do a quick water test: put a few drops of water on the surface. If the water beads up, you're still protected. If it absorbs into the stone and darkens, it's time to reseal. Pro tip: Keep a stone-safe impregnating sealer under the sink and make resealing part of your annual home maintenance routine. It takes about 30 minutes and saves you from major headaches down the road. Keeping Quartz Vanity Tops in Great Shape Quartz bathroom countertops have really taken over in recent years - and for good reason. They're non-porous, highly durable, and come in a huge range of colors and patterns. Unlike marble, quartz is an engineered stone, meaning it's made from natural quartz crystals bound together with resin. That makes it more resistant to staining and a lot easier to maintain. That said, quartz isn't totally bulletproof. Here's what you need to know. Daily Cleaning Made Easy For everyday upkeep, all you really need is a soft, damp cloth and a mild soap. Wipe down the surface after us,e and you're good to go. Because quartz vanity tops are non-porous, bacteria and mold don't have anywhere to hide - which is a huge plus in a bathroom environment. Avoid abrasive scrubbers or harsh chemical cleaners. Bleach and high-pH cleaners can degrade the resin binding over time, causing the surface to lose its shine and become vulnerable to damage. Watch Out for Heat This one surprises a lot of people. Quartz is heat-resistant up to a point, but sudden temperature changes - like placing a hot curling iron directly on the surface - can cause cracking or discoloration. Always use a heat mat or trivet, and never set hot styling tools directly on your bathroom countertop ideas for display. They're for looks, not for resting irons. Stone Vanity Tops and Other Natural Surfaces Stone vanity tops cover a broad category - granite, travertine, slate, limestone, and more. Each one has its own personality and its own care routine, but some general rules apply across the board. Natural stone is beautiful precisely because it's unique. No two slabs look the same. But that natural quality also means the stone has variations, pores, and vulnerabilities that require your attention. General Rules for Natural Stone Care • Use pH-neutral or stone-specific cleaners only • Wipe up spills quickly - especially oils, dyes, and acidic liquids • Seal annually (or more, depending on stone porosity) • Always dry the surface after cleaning - standing water causes mineral deposits • Never use abrasive pads, steel wool, or powdered cleansers Modern Bathroom Surfaces That Are Low Maintenance Not everyone wants to deal with sealing and special cleaners. If that sounds like you, you're definitely not alone. Modern bathroom surfaces like porcelain, solid surface, and cultured marble give you a lot of the same visual appeal without the intensive upkeep. These are often the go-to picks for busy households, rental properties, or anyone who just wants something easy to clean. And honestly? With today's manufacturing techniques, these surfaces look incredibly good. You can get the look of stone without the sensitivity. When shopping for the best bathroom vanities, it's worth asking yourself: how much time am I actually willing to spend on maintenance each week? That answer should drive your material decision as much as aesthetics does. If you love a clean, minimalist look, a high-gloss solid surface vanity top might be your best friend. It's seamless, non-porous, and can often be repaired if it gets scratched. Just wipe it down with an all-purpose bathroom cleaner, and you're done. Day-to-Day Habits That Make a Big Difference Regardless of what your vanity top is made of, some simple daily habits go a long way in keeping it looking its best. 1. Dry It After Every Use Water is probably the sneakiest source of damage in your bathroom. Even tap water contains minerals that leave behind hard water deposits over time. Keep a small microfiber cloth nearby and give the surface a quick wipe-down after you're done at the sink. It takes five seconds and makes a noticeable difference. 2. Use Trays and Organizers Placing your daily essentials - perfume bottles, soap dispensers, makeup - on a decorative tray protects the surface underneath. Many products have metal bottoms that can leave rust rings or dyes that can seep out if they get wet. A tray acts as a buffer and keeps things organized at the same time. 3. Clean Up Spills Right Away This one seems obvious, but it's so easy to leave a makeup spill or a toothpaste blob sitting there while you're rushing out the door. Those things harden and become way harder to remove later - and on porous surfaces like natural stone, they can cause staining. Make it a habit to wipe as you go. Choosing the Best Vanity Top Material for Easy Maintenance If you're still in the planning stages and haven't picked a material yet, this section is for you. When it comes to the best vanity top material for low maintenance, quartz consistently comes out on top. It's non-porous, resistant to staining, and doesn't need annual sealing the way natural stone does. That said, marble vanity tops and other natural stone options aren't just about looks. They can add real value to your home, and if you're willing to put in the care, they reward you with an unmatched natural beauty that engineered surfaces can't quite replicate. Here's a quick breakdown of your main options and how they stack up on the maintenance scale: • Quartz – Low maintenance, non-porous, no sealing required, great for busy bathrooms • Marble – High maintenance, needs regular sealing, stunning aesthetic payoff • Granite – Medium maintenance, durable, needs occasional sealing • Solid surface – Very low maintenance, easy to clean, and repairable if scratched • Porcelain – Low maintenance, extremely hard, resistant to heat and staining Bathroom Countertop Ideas to Inspire Your Next Upgrade Maybe you're not just maintaining - maybe you're thinking about a full upgrade. That's exciting! There are so many great bathroom countertop ideas out there right now, from bold veined marble looks to understated matte quartz finishes. Some trends that are really hitting right now in the world of best bathroom vanities: Waterfall edges on quartz bathroom countertops - where the stone continues down the side of the vanity - are super popular in contemporary and minimalist bathrooms. They add a high-end, sculptural feel without a lot of added cost. Integrated sinks (where the sink and countertop are one seamless piece) are trending hard right now, especially in smaller bathrooms. They're easier to clean because there's no seam where gunk collects, and they look incredibly sleek. Mixed materials - like pairing a marble vanity with a wood-framed mirror and matte black hardware - create a layered, designer look without feeling overdone. The key is choosing one statement material and letting everything else support it. Deep Cleaning Your Bathroom Vanity Countertops Even with regular daily cleaning, bathroom vanity countertops need a deeper clean once a week or so. Here's how to do it right without causing damage. Step 1: Clear Everything Off the Surface Remove all your products, trays, and accessories. This is also a great time to wipe the bottoms of those items before putting them back - you'd be surprised how grimy they get. Step 2: Apply the Right Cleaner Check your material type and apply the appropriate cleaner. For natural stone, use a stone-safe spray. For quartz or solid surfaces, a gentle all-purpose cleaner works fine. Spray, let it sit for a minute, then wipe with a soft cloth in circular motions. Step 3: Tackle the Edges and Seams The area where your vanity top meets the wall, or where the sink meets the counter, is where mildew and buildup love to hide. Use a soft-bristled toothbrush dipped in your cleaning solution to get into those tight spots without scratching the surface. Step 4: Rinse and Dry Thoroughly Rinse with clean water and dry the entire surface with a clean microfiber cloth. Don't let it air dry - water spots will form, especially if you have hard water. Common Mistakes That Damage Your Vanity Top Let's quickly cover some of the most common mistakes people make - because knowing what NOT to do is just as important as knowing what to do. • Using vinegar or bleach on natural stone (it etches and discolors the surface) • Leaving wet items sitting directly on the surface for extended periods • Using scouring pads or steel wool - these scratch even tough surfaces • Skipping the annual seal on porous stone surfaces • Placing hot styling tools directly on the surface - even on quartz • Ignoring small chips or cracks - these get worse over time and allow moisture in Final Thoughts: A Little Care Goes a Long Way Your vanity top is more than just a surface - it's a functional piece of your daily routine and a design statement in your home. Whether you've got gleaming quartz bathroom countertops, rich marble vanity tops, or durable stone vanity tops, the care principles are simpler than most people think. A quick daily wipe-down, the right cleaner for your material, and an annual seal on porous stone surfaces - that's really the core of it. Stack those habits together, and your vanity top will look just as good five years from now as it did on day one. And if you're still deciding on materials, take the time to think about your lifestyle honestly. How much maintenance are you realistically going to do? What matters more to you - low upkeep or natural beauty? Both are totally valid answers, and there's a perfect bathroom countertop out there for every kind of homeowner. Take care of your bathroom, and your bathroom will take care of you - one sparkling surface at a time.

Guide for Medicine Cabinet Installation with Trends & Sizes?
When it comes to a bathroom refresh, we often obsess over the tile or the hardware, but there is one hero that does the heavy lifting every single day: the medicine cabinet. In 2026, the humble storage box has evolved. It’s no longer just a place to hide your toothpaste; it’s a high-tech grooming station that can define the entire "vibe" of your sanctuary. If you’re looking to upgrade, you’ve likely realized that medicine cabinet installation involves more than just driving a few screws into a wall. From choosing between a sleek mirrored cabinet with lights to understanding the "Golden Rule" of mounting height, this guide covers everything you need to know to get it right the first time. 1. The Big Debate: Recessed vs. Surface Mount The first decision in any bathroom cabinet installation is how it sits on your wall. This choice affects both the look of your room and the complexity of the project. Recessed Installation (The "Built-In" Look) A recessed bathroom medicine cabinet installation involves tucking the unit into the wall cavity. The Pro: It offers a flush, minimalist appearance that makes small bathrooms feel significantly larger. The Catch: You’ll need a wall depth of at least 4 inches and a clear space between studs (usually 16 inches apart). You also have to be 100% sure there aren't any sneaky pipes or electrical wires behind the drywall. Surface Mount (The "Weekend Warrior" Favorite) This is the most straightforward medicine cabinet installation. The cabinet hangs directly on the wall surface. The Pro: It’s incredibly DIY-friendly and works on any wall type, even solid brick or tile. The Catch: The cabinet will protrude 4 to 8 inches. In a tight space, you might find yourself bumping into the corners if it’s not positioned correctly. 2. Cracking the Code on Standard Medicine Cabinet Sizes Choosing the right size is a balancing act. If it’s too small, it looks like a postage stamp on a billboard; too large, and it overwhelms the room. Cabinet Size Ideal For Best Use Case Small (15" – 20" wide) Powder Rooms Half-baths where only the essentials (soap, aspirin) are kept. Medium (24" wide) Standard Single Vanities The "sweet spot" for most American guest bathrooms. Large (30" – 48" wide) Master Suites Perfect for couples who need separate "zones" for skincare and grooming. Pro Tip: Your cabinet should generally be 1 to 2 inches narrower than your vanity to maintain visual balance. If you have a massive double sink, consider installing two separate 24-inch cabinets instead of one giant one-it looks more high-end and symmetrical. 3. The 2026 Glow-Up: Mirrored Cabinet with Lights In 2026, a "plain" mirror is officially out. The biggest trend in bathroom design is the lighted medicine cabinet. Why? Overhead lights create "raccoon eyes"- those annoying shadows under your eyes that make it impossible to apply makeup or get a clean shave. A mirrored cabinet with lights provides front-lit "task lighting" that illuminates your face evenly. Features to Look For in a Lighted Medicine Cabinet: CCT Tuning: This allows you to switch from "Warm White" (relaxing for evening baths) to "Daylight" (perfect for morning prep). Built-in Defoggers: No more wiping the mirror with a towel after a hot shower. Smart Sensors: Wave your hand to turn the lights on-no more messy fingerprints on the glass. 4. Medicine Cabinet Mounting Height: The "Golden Rule." This is where most people get it wrong. The standard medicine cabinet mounting height is generally 64 inches from the floor to the center of the mirror. However, "standard" doesn't always mean "perfect for you." Here is how to customize it: The Eye-Level Test: Stand in front of the wall. Your eyes should land roughly in the center of the mirror's vertical span. The Faucet Gap: Leave at least 5 to 10 inches of space between the top of your faucet and the bottom of the cabinet. This prevents water from splashing onto the mirror and ensures the door can swing open without hitting the hardware. The Ceiling Clearance: If you have a bathroom mirror cabinet with lights, ensure there is enough room at the top for the light to disperse without being blocked by a soffit or crown molding. 5. Advanced Features You Didn't Know You Needed Modern bathroom mirror cabinets with lights are basically computers for your wall. When shopping for your Dreamwerks upgrade, look for these "hidden" gems: Internal Outlets: Charge your electric toothbrush or razor inside the cabinet to keep your counter clutter-free. Magnetic Strips: Perfect for holding tweezers, nail clippers, and bobby pins. Hidden Mirrors: High-end models have mirrors on the inside of the door and the back of the cabinet, so you can see the back of your hair while you style it. 6. DIY Medicine Cabinet Installation: A Quick Checklist If you’re tackling the bathroom cabinet installation yourself, keep these simple steps in mind: Check for Level: Walls are rarely perfectly straight. Use a 2-foot level to ensure your cabinet isn't leaning. Use the Right Anchors: If you aren't hitting a stud, use heavy-duty toggle bolts. A medicine cabinet full of glass bottles is heavy! Door Swing: Before drilling, "test swing" the door. Make sure it doesn't hit the side wall, a hanging towel bar, or the bathroom door. Final Thoughts Upgrading your storage isn't just about utility; it’s about making your daily routine feel a little more like a luxury experience. Whether you choose a minimalist recessed unit or a high-tech lighted medicine cabinet, getting the medicine cabinet mounting height and size right is the key to a professional finish. Ready to find your perfect match? Browse our latest collection of mirrored cabinets to find the style that fits your home.

Shower Glass Doors vs. Curtains: Which Is Truly Better?
When you stand in your bathroom and look at your tub, you’re usually looking at one of two things: a piece of fabric hanging from a rod or a solid pane of glass. It’s a debate that has sparked countless conversations during bathroom-remodeling sessions. Whether you are flipping a house or finally fixing up your forever home, the question remains: Are glass bathtub doors better than shower curtains? The short answer is that it depends on your lifestyle, but if we’re talking about long-term value and aesthetics, shower glass doors usually take the trophy. In this deep dive, we’re going to look at everything from cleaning and cost to how these choices affect your home’s resale value. 1. The Visual Impact: Make Your Bathroom Feel Bigger and Brighter The first thing anyone notices when walking into a bathroom is the sense of space. A shower curtain, no matter how pretty the pattern is, acts like a wall. It cuts your bathroom in half visually. If you have a smaller space, this can make the room feel cramped and dark. On the other hand, glass tub enclosures create a seamless line of sight. Because you can see straight through to the back wall of the shower, the room feels double the size. This is one of those modern bathroom upgrades that provides an instant "wow" factor. It turns a standard tub into a spa-like retreat. If you want that ultra-clean, high-end look, frameless glass doors are the gold standard. They don't have the bulky metal frames that older styles used, meaning there is nothing to distract the eye. It’s pure, clean, and sophisticated. 2. Maintenance and Hygiene: The Grime Factor Let's talk about the "ick" factor. We’ve all seen it—that orange or black mildew that starts to grow at the bottom of a shower curtain liner. Because curtains are porous and take a long time to dry, they become a breeding ground for bacteria. Why Glass Wins on Health Shower glass doors are non-porous. While they can get soap scum, they don’t soak up water like a sponge. When you install custom glass shower doors, you’re investing in a surface that is much easier to sanitize. A quick spray with a daily cleaner and a 30-second pass with a squeegee keeps them looking brand new. Low Maintenance for Busy Lives If you are someone who hates deep-cleaning day, you should look into low-maintenance countertops and surfaces throughout your bathroom. Just as you’d choose low-maintenance countertops for your kitchen to save time, choosing a glass door over a curtain saves you from the constant cycle of washing or throwing away plastic liners. It’s better for your schedule and much better for the environment. 3. Durability: Thinking Long-Term A shower curtain is a temporary fix. It’s cheap, sure, but you’ll probably replace it once or twice a year as it gets tattered or stained. When we talk about the most durable countertop materials or flooring, we’re looking for things that last for decades. The same logic applies to your shower. The Strength of Tempered Glass Frameless glass doors are made from thick, tempered safety glass. This isn’t the thin glass found in a picture frame; it’s designed to withstand impact and heat changes. In terms of longevity, sliding glass doors for your tub can easily last 20 years or more with basic care. When you compare the most durable countertop in your home to your bathroom fixtures, you want everything to have that same "built-to-last" quality. A glass door doesn't tear, it doesn't fade in the sun, and it doesn't lose its shape. 4. The Functional Battle: Water Retention There is nothing worse than stepping out of the shower onto a soaking-wet bath mat. Shower curtains are notorious for "billowing." Because of the air pressure difference, the curtain often sucks inward, touching your legs while you’re trying to wash, and allowing water to escape out the sides. Sliding glass doors create a much tighter seal. They are specifically designed to keep the water inside the basin. If you have high-pressure showerheads or kids who love to splash, glass tub enclosures act as a solid barrier. No more mopping up the floor after every single bath. 5. Small Bathroom Solutions If you are working with a tight floor plan, every inch matters. Many people think they have to stick with a curtain in a small room, but that’s a misconception. Strategic Design For those with small bathroom vanities and limited square footage, a swinging door might not work. However, sliding glass doors stay on a track, meaning they don't require any "swing zone." This allows you to place small bathroom vanities or towel racks right next to the tub without any interference. In fact, using a frameless tub door in a small bathroom is a classic designer trick. It removes the visual "clutter" of a rod and rings, making the ceiling feel higher and the floor feel wider. 6. Customization and Style A shower curtain is a "one size fits all" solution, which often means it looks a bit sloppy. Custom glass shower doors are measured to the millimeter to fit your specific tub. This ensures a perfect fit, especially if your walls aren't perfectly straight (which, let's be honest, most aren't). Matching Your Vanity When you are designing your dream space, you want your shower to match your custom vanity design. If you’ve invested in floating vanity tops, you want a shower that matches that modern, airy vibe. A heavy, opaque curtain would hide all that beautiful custom vanity design work. Glass allows the different elements of the room—the tile, the hardware, and the vanity—to work together in harmony. 7. Resale Value: Is It an Investment? Let's be real: nobody ever bought a house because they loved the shower curtain. However, people do buy houses because of beautiful bathrooms. Shower glass doors are considered a high-end finish by appraisers and buyers alike. When people walk through an open house, they are looking for "move-in ready" features. Seeing a frameless tub door tells a buyer that the home has been updated and cared for. It’s similar to how stain-resistant countertops in a kitchen add immediate value. Buyers know they won’t have to spend money upgrading the "bones" of the room. If you choose stain-resistant countertops and glass doors, you are effectively "future-proofing" your home. 8. Practicality: Is Glass Right for Everyone? While we love the look of glass, we want to be honest about the lifestyle fit. For Families with Small Kids: Sometimes a curtain is easier because you can push it completely out of the way to reach in and scrub a toddler. However, many modern sliding glass doors now offer "bypass" features where both panes move, giving you plenty of access. For Accessibility: If you have someone in the home with mobility issues, a frameless glass door setup with a wide opening can actually be safer than a curtain rod that might be pulled down if someone loses their balance. 9. Cost Comparison: Upfront vs. Lifetime There is no denying that a shower curtain is cheaper on day one. You can grab one for $20. A high-quality frameless glass doors setup from a reputable brand like Dreamwerks is an investment. But think about the "hidden" costs of curtains: Replace the liner every 6 months. The cost of laundry (washing heavy curtains). The potential cost of water damage to your subfloor from leaks. When you look at it over 10 years, the price gap narrows significantly. Plus, the joy of using a beautiful, functional space every morning has a value of its own. 10. Coordinating Your Bathroom Aesthetic To get that "magazine look," you need to coordinate your materials. If you have floating vanity tops, you’ve already committed to a sleek, minimalist style. Adding a bulky curtain would be like wearing sneakers with a tuxedo. The transparency of glass allows you to show off your tile work. If you spent money on beautiful subway tile or a herringbone pattern inside your tub area, don't hide it! Glass allows that craftsmanship to be part of the room’s decor. 11. Easy Installation and Safety Many homeowners are intimidated by the idea of installing shower glass doors. While it’s a more involved process than tension-mounting a rod, modern kits have made it much more accessible. At Dreamwerks, we focus on precision engineering to ensure that the installation is straightforward and the final product is secure. Safety is also a top priority. Unlike the old-school glass doors from the 1970s, today's glass tub enclosures use heavy-duty tempered glass that is designed to crumble into small, dull pieces in the rare event of a break, rather than sharp shards. Summary: The Verdict Are glass bathtub doors better than shower curtains? If you value cleanliness, style, and home value, the answer is a resounding yes. While curtains offer a quick, colorful fix, shower glass doors provide a permanent upgrade that transforms the entire feel of your home. They stop leaks, eliminate moldy fabric, and make your bathroom feel like a luxury suite. When you’re planning your next round of bathroom remodeling ideas, don't just think about the paint colors. Think about the fixtures that you touch and use every single day. From the most durable countertop you select for your vanity to the glass you choose for your tub, every detail contributes to a home that is both beautiful and easy to live in. Quick Checklist for Your Upgrade: Measurement: Always double-check your tub width. Style: Choose between sliding (best for space-saving) or hinged. Finish: Match your door hardware to your faucet and vanity handles for a cohesive look. Maintenance: Grab a high-quality squeegee to keep that glass sparkling. Ready to ditch the curtain? Whether you are looking for custom glass shower doors to fit a unique space or a sleek frameless tub door to modernize your guest bath, making the switch is one of the best decisions you can make for your home.

Why Picking the Right Material Matters for Your Home
When you decide to update your home, one of the biggest questions you will face is: What is the best vanity top material for a bathroom? This might seem like a simple question, but it is actually a very important decision. The surface you choose is the foundation of your bathroom’s look and feel. It is the place where you get ready for work, where the kids brush their teeth, and where you unwind at the end of a long day. At Dreamwerks, we believe that every home deserves a bathroom that is both beautiful and easy to manage. Whether you are browsing our Vanity Tops collection for a quick weekend project or a full home remodel, picking the Best Vanity Top Material will save you time, money, and stress in the long run. In this very detailed guide, we are going to break down every option available. We will use simple words to explain the pros and cons of each material so you can make the smartest choice for your family. Why Picking the Right Material Matters for Your Home Before we look at the specific materials, let's talk about why this choice is so important. Your bathroom is unlike any other room in your house. It is a place that gets very wet, very humid, and very messy. Unlike a kitchen counter, which mostly deals with food, a bathroom counter deals with things like toothpaste, hairspray, makeup, and high heat from hair tools. If you pick a material that is too soft, it might get stained by a drop of blue toothpaste. If you pick a material that is too weak, it might crack if you drop a heavy glass bottle on it. The best bathroom vanity material is the one that can handle your specific lifestyle. If you have three kids sharing one bathroom, you need something much tougher than someone living alone in a quiet apartment. 1. Quartz: The Modern King of the Bathroom If you talk to most home designers today, quartz vanity tops are almost always the first recommendation. Quartz is not a 100% natural stone slab pulled from the earth. Instead, it is an "engineered" stone. It is made by taking crushed natural quartz and mixing it with a strong glue called resin and some color pigments. Why Quartz is Often the Best Vanity Top Material: It Never Stains: Because it is man-made, quartz is non-porous. This means it has no tiny holes or pores. If you spill nail polish or hair dye on quartz bathroom countertops, the liquid just sits on top. It cannot soak in and leave a permanent mark. No Sealing Required: Many natural stones need to be coated with a special liquid (called a sealer) every year to keep them safe. Quartz never needs this. You just wipe it clean with soap and water, and you are done. Incredible Strength: It is very hard to chip or scratch quartz. It can handle the "wear and tear" of a busy family for decades. Beautiful Styles: Because it is made with pigments, you can find quartz vanity tops in every color imaginable. Some look like pure white clouds, while others look exactly like expensive Italian marble. For the average homeowner, quartz is the Best Vanity Top Material because it gives you the look of luxury without any of the hard work. 2. Marble: The Queen of Luxury For many people, nothing compares to a marble vanity. Marble is a natural stone that has been used in palaces and famous buildings for thousands of years. It has a soft, glowing look that is very hard to copy. If you want your bathroom to feel like a high-end spa or a fancy hotel, marble is the way to go. Things to Think About with Marble: While marble vanity tops are breathtakingly beautiful, they are a bit "fragile" compared to other options. Marble is a soft stone. It is porous, which means it has millions of tiny holes. Staining: If you leave a wet bottle of soap on the counter, it might leave a ring. Etching: Acidic things like lemon juice or certain face washes can actually "eat" into the surface, leaving a dull spot that you can't just wipe away. Sealing: You must seal a marble vanity at least once or twice a year to keep it looking new. Even though it takes more work, many people still consider marble among the best bathroom vanities because of its unique beauty. If you are a person who likes to keep a very clean house and doesn't mind a little extra care, marble will reward you with a stunning look that never goes out of style. 3. Granite: The Tough Natural Stone If you love the idea of natural stone but you want something much stronger than marble, granite is a fantastic choice for bathroom vanity countertops. Granite is formed deep inside the Earth from cooling lava. This makes it incredibly hard and dense. The Benefits of Granite: High Heat Resistance: This is a big one for bathrooms. You can set a hot curling iron or a flat iron directly on granite, and it will not burn or mark the surface. One-of-a-Kind: Since nature makes it, no two stone vanity tops made of granite are the same. Your vanity will be a unique piece of art. Resale Value: People who buy houses love to see granite. It makes a home feel high-quality and sturdy. While granite is much tougher than marble, it is still a natural stone and needs to be sealed occasionally. However, it is very hard to scratch, making it one of the best bathroom vanity material choices for families who want a natural look but need more durability. 4. Solid Surface: Smooth and Seamless Another great option for modern bathroom surfaces is called "Solid Surface." You might know this by brand names like Corian. It is made of a mix of acrylic and polyester. The coolest thing about this material is that the sink can be built directly into the countertop. This means there are no "seams" or cracks between the sink and the counter. Why People Like Solid Surface: Very Hygienic: Since there are no seams, there is nowhere for mold or dirt to hide. It is very easy to stay germ-free. Can be Repaired: If you accidentally scratch a solid surface counter, you can actually sand the scratch out with a little bit of sandpaper. You can't do that with a stone! Soft Feel: It doesn't feel cold like stone; it has a warmer, softer touch. At Dreamwerks, we love these types of modern bathroom surfaces because they look very clean and minimalist, which is a big trend right now. 5. Ceramic and Vitreous China You will often see ceramic tops on smaller vanities. These are made from clay that is fired in a very hot oven. Ceramic bathroom vanity countertops are great because they are 100% waterproof. They are also very affordable. Because the surface is like a dinner plate, it is very smooth and easy to wipe down. This is often the Best Vanity Top Material for a small guest bathroom or a half-bath where you want something simple and clean. Design Inspiration: Bathroom Countertop Ideas Now that you know about the materials, how do you make them look good? Here are some simple bathroom countertop ideas to get you started: The White-on-White Look Using white quartz bathroom countertops on a white cabinet makes a small bathroom look huge and bright. It feels fresh and clean every morning. Natural Contrast If you have dark wood cabinets, try using a light-colored stone vanity top with grey or gold veins. This creates a very warm and inviting feeling. The Bold Master Suite In a main bathroom, don't be afraid to go bold. A dark granite or a heavily veined marble vanity can become the centerpiece of the whole room. How to Measure for Your New Top Getting the right size is just as important as picking the right material. If the top is too small, it will look funny. If it is too big, it won't fit the space. Measure the Cabinet: Measure the width of your vanity cabinet (left to right). Standard sizes are usually 24, 30, 36, 48, or 60 inches. Add the Overhang: Most vanity tops should be about 1 inch wider and 1 inch deeper than the cabinet. This keeps water from dripping down the front of your drawers. Find the Center: Measure from the side to the middle of where your sink will be. This helps make sure the plumbing lines up. Count the Holes: Does your faucet need one hole, or three? Make sure your new bathroom vanity countertops are drilled correctly for the faucet you want to use. Easy Maintenance: Keeping Things Shiny Once you have picked the Best Vanity Top Material, you need to take care of it. Here are some simple rules that work for almost every surface: No Harsh Chemicals: Avoid using things like bleach or scrubby powders. These can take the shine off quartz vanity tops and natural stone. Use Microfiber: A soft microfiber cloth is the best tool for cleaning. It picks up dust and water without scratching. Wipe it Dry: Don't let water sit on the surface for hours. Even the best modern bathroom surfaces look better when they are kept dry and shiny. Coasters and Trays: Just like you use a coaster for a drink on a wooden table, use a small tray for your perfumes and oils. This prevents "bottle rings" from forming on your beautiful new counter. Conclusion: Making Your Final Decision Finding the best bathroom vanity material doesn't have to be a headache. If you want a counter that is impossible to ruin and easy to clean, go with quartz vanity tops. If you want a classic, expensive look and don't mind a little extra cleaning, go with a marble vanity. If you want a strong, natural surface that can handle heat, go with stone vanity tops like granite. At Dreamwerks, we are here to help you every step of the way. We want you to love your bathroom for years to come. Your vanity is the heart of the room, so take your time and pick the material that feels right for you. Ready to see these materials in person? Head over to our Vanity Tops page to find the perfect size and style for your home. You are just one step away from the bathroom of your dreams!

What is the most durable countertop for a bathroom vanity?
Aesthetics and long-term durability must be balanced while selecting the ideal surface for your bathroom. At Dreamwerks, we recognize that a bathroom is more than just a utility room—it's a high-traffic haven that needs to endure everyday wear, cleaning agents, and humidity. If you're remodeling, you probably want to know what the durable countertop option is. We will go into great detail about the materials that define lifespan in 2026 in this guide to assist you in selecting a surface that will last for many years. The Search for the Most Durable Countertop When evaluating bathroom surfaces, durability isn't just about hardness. It’s about how the material reacts to the unique environment of a bathroom. Between the steam from the shower and the accidental spills of hair dye or nail polish, you need a surface that doesn't just look good on day one but stays beautiful for a decade. For many homeowners, finding the most durable countertop means looking beyond the price tag to the chemical composition of the stone. While marble is often the first choice for luxury, it is notoriously porous. If you want a bathroom that doesn’t require a "hands-off" policy, you should prioritize materials like quartz or high-grade granite. These materials are engineered or naturally formed to resist the structural fatigue common in damp environments. Why Quartz Leads the Pack in 2026 Quartz has officially taken the throne as the most durable countertop for modern homes. Unlike natural stone, which has tiny microscopic pores, quartz is an engineered product made of roughly 90-95% ground natural quartz and 5-10% resins. This creates a virtually indestructible surface. It won't chip if you drop a heavy glass bottle, and it won't etch when it comes into contact with acidic soaps. Tackling the Mess: Stain-Resistant Countertops One of the biggest frustrations in bathroom maintenance is the "ghost" of a spilled bottle of foundation or a ring left by a damp soap dispenser. This is why stain-resistant countertops have become a top priority for families. Materials like porcelain slabs and quartz are naturally non-porous. This means that liquids stay on the surface rather than soaking into the stone. If you’ve ever dealt with a permanent ring on a marble surface, you know how vital this feature is. When we talk about stain-resistant countertops, we are looking for materials that provide a barrier against the pigments found in makeup and hair care products. Comparing Stone Porosity Quartz: Zero porosity; impossible to stain with standard bathroom products. Granite: Low porosity; requires sealing once a year to remain protected. Marble: High porosity; can stain from water alone if left sitting. Efficiency in Design: Low-Maintenance Countertops In today's fast-paced world, nobody wants to spend their Saturday morning scrubbing and resealing stone. The demand for low-maintenance countertops has shifted the market toward "set it and forget it" materials. A low-maintenance countertop option should only require a quick wipe with a microfiber cloth and warm water. You should avoid materials that require specialty pH-neutral cleaners or periodic professional buffing. Solid surface materials and quartz fit this description perfectly. They handle the humidity of a master bath without warping or losing their luster, allowing you to focus on your morning routine rather than stone upkeep. Maximizing Style in Limited Areas Not every bathroom has the luxury of a sprawling double-sink layout. Many urban homes and powder rooms require clever solutions for smaller footprints. Small Bathroom Vanities When working with small bathroom vanities, every square inch of the countertop matters. You want a material that can be custom-cut to include integrated features without looking cluttered. A compact vanity doesn’t have to sacrifice durability. By choosing a high-strength stone for small bathroom vanities, you ensure that even in a cramped space where items are frequently knocked over, the surface remains unblemished. Floating Vanity Tops For those seeking a minimalist, spa-like aesthetic, floating vanity tops are the go-to choice in 2026. Because these units are wall-mounted, the weight of the stone is a critical factor. However, you shouldn't compromise on the durable countertop quality just to save weight. Modern fabrication allows for thinner, reinforced slabs of porcelain or quartz that provide the look of a heavy block while being light enough for floating vanity tops. This creates an airy feel in the room while maintaining a rock-solid surface for your daily essentials. The Art of Personalization: Custom Vanity Designs Your bathroom should reflect your personal style, which is where custom vanity designs come into play. A custom approach allows you to choose unique edge profiles, integrated sinks, and specific slab veinings that match your cabinetry. When you invest in custom vanity designs, you are usually working with a fabricator to create a "one-of-a-kind" piece. This is the perfect time to ensure that your durable countertop is the hero of the room. Whether it's a waterfall edge that flows to the floor or a backlit translucent stone, customization allows you to marry high-end fashion with the practical needs of a busy household. Why Customization Matters. A custom-built vanity often yields a higher return on investment (ROI) because it addresses the specific dimensions of your space. Professional custom vanity designs ensure there are no awkward gaps where water can seep in and damage your walls, further extending the life of your renovation. Summary Table: Durability Comparison Material Durability Rating Maintenance Level Best For Quartz 10/10 Very Low Busy families & rentals Granite 8/10 Medium (Needs Sealing) Luxury & high heat areas Porcelain 9/10 Low Modern, thin-profile looks Marble 5/10 High Guest baths & low-use areas Final Thoughts on Choosing a Durable Countertop Selecting a durable countertop is an investment in your home’s future. By prioritizing materials that are stain-resistant and low-maintenance, you reduce the long-term costs of repair and replacement. Whether you are installing floating vanity tops in a modern condo or looking for small bathroom vanities for a guest suite, the quality of the stone surface will dictate the longevity of the entire room. At Dreamwerks, we believe that you shouldn't have to choose between a beautiful design and a surface that can survive a busy morning. Focus on the materials that offer the best protection against moisture and chemicals, and your bathroom will remain a source of pride for decades.