
Dreamwerks BLOG / ARTICLES

Steps to Install Shower Base Tracks on Uneven Floors
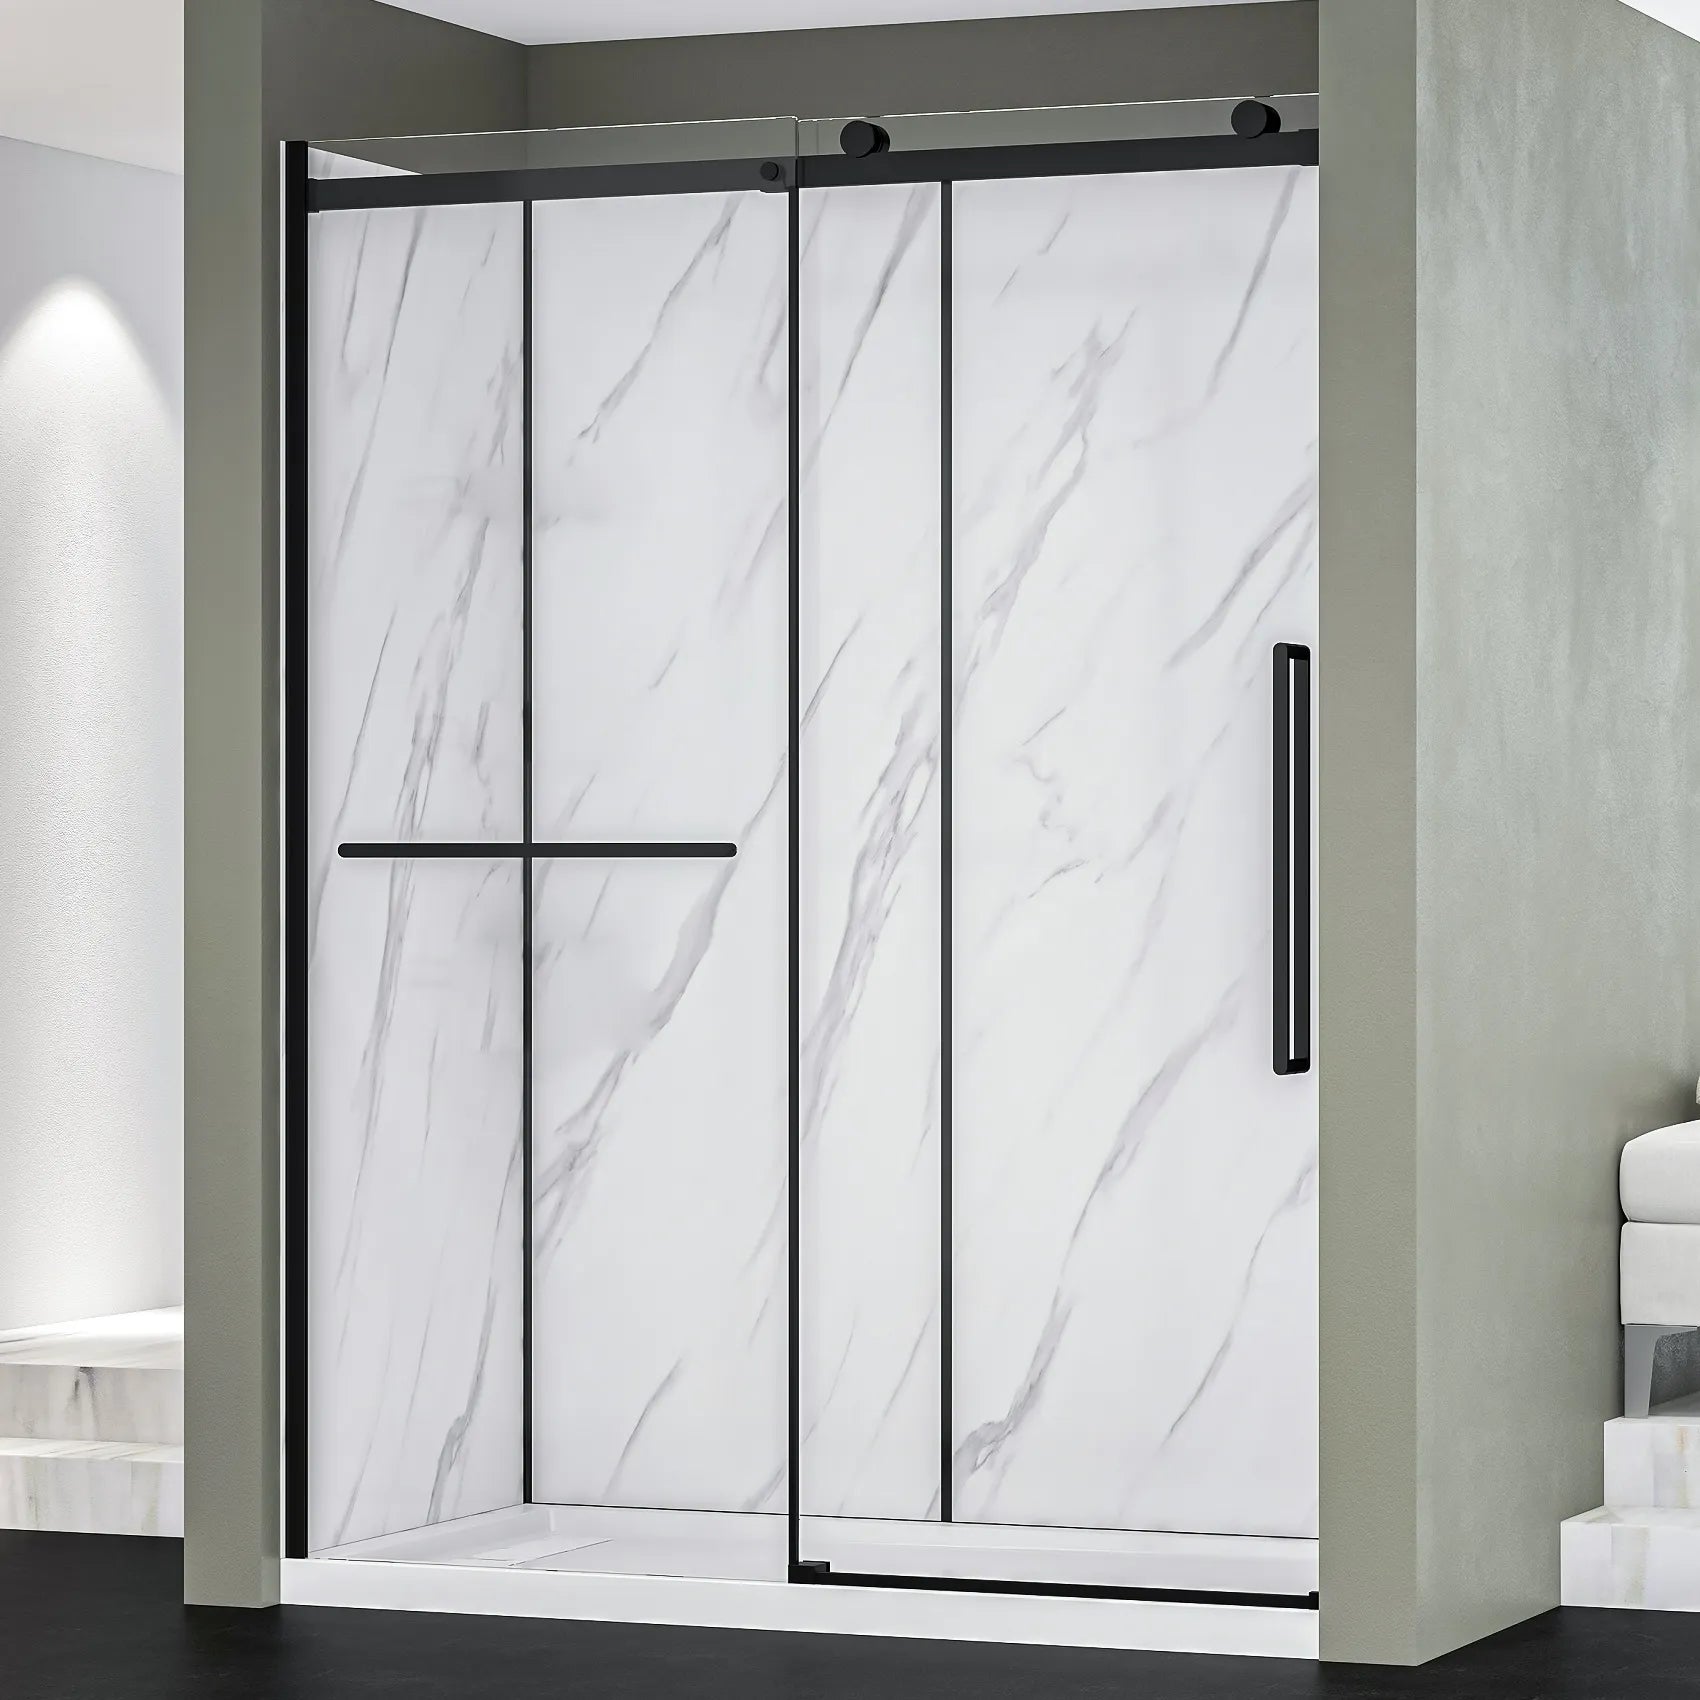
Let's be honest - uneven bathroom floors are a pain. If you've ever tried to install shower base tracks and ended up with gaps, rocking panels, or water pooling in the wrong places, you already know the struggle. The good news? This is totally fixable, even if you're not a professional contractor. With the right prep work and a little patience, you can get a watertight, solid result that looks great and lasts for years. This guide walks you through every step of how to install shower base tracks on an uneven floor - from checking your floor level to sealing everything up at the end. We'll also cover some common questions people have about shower kit installation so you can feel confident before you start. Why the Floor Level Matters So Much Before we get into the steps, it helps to understand why an uneven floor causes so many problems in the first place. When you install shower base tracks, those tracks form the bottom perimeter of your shower walls. If the floor isn't level, the tracks won't sit flat - and that means leaks, unstable panels, and a shower that just doesn't look right. Most complete shower kits are designed with some degree of adjustment in mind, but they're not magic. A variance of more than 1/4 inch across the base area usually needs to be corrected before installation. The fix doesn't have to be complicated, but skipping this step will cause you headaches down the road. Tools and Materials You'll Need Gather everything before you start. Here's what you'll need for a typical shower kit installation: • Spirit level or laser level • Self-leveling compound or floor shims • Tape measure • Pencil or chalk line • Drill with bits • Hacksaw or track cutter • Silicone caulk (waterproof) • Caulk gun • Rubber mallet • Safety glasses and gloves Having all of this on hand before you begin saves you from stopping mid-job to run to the hardware store. Trust us - it's worth the prep time. Step 1: Assess the Floor and Find the High and Low Spots Place your spirit level in multiple directions across the shower area - side to side, front to back, and diagonally. Mark the high and low spots with a pencil. You're looking for the total variance, which tells you how much correction you need. If the floor is off by less than 1/8 inch, you can often get away with shimming the base tracks directly. For larger gaps, self-leveling compound is your best bet. It flows into low spots and dries flat, giving you a solid, even surface to work on. Step 2: Level the Surface Before You Install the Shower Base If you're using self-leveling compound, follow the manufacturer's directions carefully. In most cases, you'll need to clean the floor thoroughly, apply a primer, and then pour the compound. It spreads on its own, but you may need to guide it into corners with a trowel. Let it cure fully - usually 24 hours - before moving on. If you're shimming instead, plastic shims work better than wood in a wet environment. Place them at the low points under where the base tracks will sit. You'll fine-tune these as you go, so don't glue anything down yet. The goal at this stage is just to get close. This prep step is what separates a clean install from a messy one. Whether you're working with corner shower kits or a larger walk-in configuration, a level base makes everything else easier. Step 3: Dry-Fit the Tracks and Mark Your Positions Before you seal anything down, do a dry fit. Lay the base tracks in position without any caulk or adhesive. This lets you check that the corners align properly, the tracks sit flat, and the overall footprint matches your shower area. Once everything looks right, use a pencil to trace the outline of each track onto the floor. This gives you a guide to work from when you apply caulk. It also helps you confirm your measurements before you commit. For corner shower kits, pay extra attention to the 90-degree corners. These are the spots most likely to have alignment issues, especially on uneven floors. Take your time here and double-check with your level before marking. Step 4: Cut the Tracks to Length Most shower enclosure kits come with tracks that need to be cut to fit your specific space. Use a hacksaw or a fine-tooth saw for clean cuts. Measure twice, cut once - the old advice is still the best advice. For the front track (the one facing the shower opening), you'll need to account for the door or curtain opening. If your shower enclosure kits include a door, check the instructions for the exact measurement. Some kits require a specific overlap for the door to seal correctly. After cutting, smooth any rough edges with a metal file. Sharp edges can damage seals and scratch the shower base, so this step is worth the few extra minutes it takes. Step 5: Apply Caulk and Set the Tracks in Place Run a bead of waterproof silicone caulk along the bottom of each track. Keep the bead continuous - gaps in the caulk line are the #1 cause of leaks in shower installations. Then press each track firmly into position, aligning it with your pencil marks. If you're shimming, this is the time to finalize the shim positions. Press the track down onto the shims and check your level again. Adjust as needed until the track sits perfectly flat. Then apply caulk around the outside perimeter to lock everything in and seal out moisture. Use a rubber mallet to gently tap the tracks into full contact with the floor. Don't force it - if a section won't sit flat, a shim is probably in the wrong place. Work slowly and recheck your level as you go. Step 6: Let It Cure, Then Build Up the Rest of Your Shower Give the caulk at least 24 hours to cure before you move on to installing wall panels or doors. It's tempting to rush this part, but moving on too soon can shift the tracks and ruin your level base. Set a timer and walk away. Once the caulk is fully set, you can proceed with the rest of how to install shower components - walls, panels, glass enclosures, and fixtures. If you're working with the install a shower kit instructions from the manufacturer, follow them in order from this point. The hard part is behind you. Installing wall panels into properly seated base tracks is straightforward compared to the floor work. The panels should slot in cleanly, and the corners should line up without forcing. Frequently Asked Questions Can I install shower base tracks on a tile floor? Yes, but tile floors add a layer of complexity because grout lines can create uneven contact points. You'll want to check the level across multiple tiles and use silicone caulk generously to fill any gaps between the track and the grout lines. Avoid drilling into tile unless necessary - most tracks rely on caulk adhesion rather than mechanical fasteners. How much floor variance is acceptable? Most manufacturer guidelines for complete shower kits allow for up to 1/4 inch of variance without requiring a leveling compound. Beyond that, you should address the floor before installation. Even if the kit can technically accommodate more variance, a flatter surface will always give you a better result. Do I need special tools to install a shower kit? Nothing exotic. A level, a tape measure, a hacksaw, and a caulking gun are the basics. Some people add a power drill for wall anchors, but many modern shower kits are designed for tool-minimal installation. If you're upgrading from an older setup or replacing luxury bathtubs with a shower enclosure, check what's already in your bathroom - the tools you need may already be on hand. What's the best caulk to use for shower base tracks? 100% silicone caulk is the standard recommendation for shower installations. It's fully waterproof, flexible enough to handle minor movement, and holds up well in wet environments. Avoid latex or acrylic caulk for the base tracks - they don't hold up as well under constant moisture exposure. How do I know if my shower base tracks are properly installed? After the caulk cures, check for three things: the tracks should be fully flush with the floor (no rocking), there should be no visible gaps in the caulk line, and the corners should meet cleanly without overlapping awkwardly. Run your hand along the inside edge of the track - it should be smooth. Any rough spots or gaps should be re-caulked before you install the wall panels. A Few Tips Specific to Different Shower Kit Types Not all kits are created equal, and the type you're working with can affect your approach slightly. Corner Shower Kits Corner shower kits fit into the corner of a room, which means two walls are already fixed. That limits your ability to adjust position after the tracks are down, so accuracy during the dry-fit stage is extra important. Get the corner square before you do anything else. Shower Enclosure Kits with Glass Panels Glass panels are heavy, and even a slight misalignment in the base tracks can make them hard to slot in properly. Be extra precise when leveling, and make sure the tracks are aligned perfectly before the caulk sets. If you're replacing luxury bathtubs with a glass shower enclosure, you may also need to remove tile or drywall around the tub area before setting the new tracks. How to Install Shower Kit Components After the Base Once your tracks are down and cured, follow the manufacturer's sequence for how to install shower kit components. Most kits start with wall panels before the door or glass. Don't skip steps or try to install everything at once - the sequence is designed to make each step easier than the one before. Final Thoughts Learning how to install shower components on an uneven floor takes a bit more patience than a standard flat-floor installation, but it's absolutely within reach for a motivated DIYer. The key is in the prep - level the floor, dry-fit your tracks, and don't rush the caulk cure time. Whether you're working with corner shower kits, installing a shower kit that came as a complete package, or piecing together individual shower enclosure kits, the base track installation process is the same. Get that foundation right, and the rest of the build is much more straightforward. If you ran into a specific challenge not covered here, drop it in the comments - uneven floors come in all shapes, and there's usually a workable solution. Good luck with your project!
Read moreDreamwerks BLOG / ARTICLES

Can I Install a Shower Kit Myself? The Ultimate DIY Guide to Success
One of the most satisfying home improvement projects you can do is remodeling a bathroom. It adds value to your home and improves your daily routine. However, the biggest question homeowners face is: Can I install a shower kit myself? The short answer is yes—with the right tools, a bit of patience, and a solid plan, you can achieve a professional-looking result. In this comprehensive guide, we will break down everything you need to know about installing a shower kit, helping you decide if this is a project you should tackle this weekend. Why Choose a Shower Kit for Your DIY Project? Before we dive into the "how-to," it is important to understand why shower kits are the preferred choice for DIY enthusiasts. Unlike traditional tile showers that require complex waterproofing, mud beds, and days of grouting, a kit is designed for efficiency. Most kits from Dreamwerks include a pre-sloped base and matching wall panels. This eliminates the guesswork of drainage and significantly reduces the risk of leaks. If you are looking for a walk-in shower DIY solution, these kits are specifically engineered to fit together like a puzzle, making the installation much more approachable for a beginner. Assessing Your Skills: Is This Project Right for You? While the process is streamlined, you do need a baseline of "handyman" skills. Ask yourself the following: Can I use a circular saw or a jigsaw to cut wall panels? Am I comfortable using a drill and a level? Do I have a basic understanding of how to connect a drain? If you can answer yes to these, you are likely ready to install a shower kit without professional help. The Essential Toolkit for Professional Shower Installation To ensure your shower kit installation goes smoothly, you need to gather your tools before you start. There is nothing worse than being halfway through a project and needing to run to the hardware store. Necessary Tools: Level (4-foot is best): Vital for the base. Caulk Gun: For high-quality silicone sealant. Power Drill: For securing panels to studs. Measuring Tape: Accuracy is everything in plumbing. Hole Saw: To cut openings for the shower valve and head. Step 1: Preparing the Space and Learning How to Install Shower Areas Success starts with the "bones" of your bathroom. You cannot simply throw a new kit over a rotten floor. You must strip the area down to the studs and the subfloor. Check for any signs of water damage or mold. If the wood is soft, replace it now. This is also the time to ensure your plumbing lines are in the correct position. If you are learning how to install shower components for the first time, take photos of the pipes before you close the walls. Step 2: How to Install a Shower Base Properly The foundation of your entire shower is the floor, often called the pan or base. This is the most critical stage of the project. If the base is not level, the water will not drain, and your wall panels will not line up. When you install shower base units, you should always perform a "dry fit" first. Place the base in the spot where it will live and check it with your level. If there are gaps, you will likely need to use a thin-set mortar bed underneath to create a firm, level foundation. Once the mortar is down, set the base and let it cure according to the manufacturer's instructions. Step 3: Managing the Plumbing Connections During Shower Kit Installation Many people feel intimidated by plumbing, but modern kits make it easier. Most kits use a compression-style drain that tightens around the pipe. When figuring out shower kit drainage, remember to use plumber's putty or a high-quality silicone gasket. Ensure the drain pipe is cut to the exact height specified in your Dreamwerks manual. A leak under the floor is a nightmare to fix later, so double-check these seals! Step 4: Installing the Wall Panels Once the base is set and the drain is connected, it is time for the walls. This is where your walk-in shower DIY really starts to take shape. Measure and Cut: Measure the location of your shower handle and shower head. Mark these on the panel and use a hole saw to cut them out. Apply Adhesive: Use a construction adhesive that is specifically safe for acrylic or composite materials. Press and Secure: Press the panels against the studs. Many kits allow you to screw the flanges directly into the wall studs for maximum stability. Step 5: Sealing for a Watertight Finish The final step of a successful shower kit installation is the sealant. This is what keeps the water inside the shower and out of your walls. Use 100% silicone caulk. Avoid "latex" caulks as they can break down over time in wet environments. Apply a smooth bead along every joint: where the walls meet the base, and where the corner panels overlap. Use a wet finger or a smoothing tool to create a clean, professional edge. Common Challenges and How to Overcome Them Even with a great guide on how to install shower kit systems, you might run into a few hurdles: Out-of-Plumb Walls: If your house is older, the studs might not be perfectly straight. You can use shims (small pieces of wood) to level out the studs before you attach your wall panels. Drain Alignment: If your existing drain doesn’t line up with the new base, you may need to cut into the subfloor to relocate the pipe. If this feels too complex, this is the one stage where calling a plumber for an hour of work might be worth the investment. Maintenance: Keeping Your New Shower Like New After you successfully install a shower kit, you want it to last for decades. The beauty of DreamWerks kits is that they are non-porous and easy to clean. Avoid abrasive cleaners that can scratch the surface. Use a squeegee after each shower to prevent hard water stains. Check the silicone seals once a year and touch them up if you see any peeling. Final Thoughts: DIY Pride By following these steps, you’ve learned how to install shower units that look like they were done by a master contractor. Not only have you saved thousands of dollars in labor costs, but you have also gained the satisfaction of knowing the job was done right. A walk-in shower DIY project is one of the best ways to modernize a home. As long as you focus on a level install shower base and high-quality sealing, your new shower will be a centerpiece of your home for years to come.

Common Shower Kit Installation Mistakes | How to Avoid Them
Installing a shower kit is one of the most rewarding bathroom upgrades you can make - but it's also one where small mistakes can lead to big headaches. Whether you're renovating a full bathroom or simply replacing an outdated unit, knowing what not to do is just as important as knowing the right steps. This bathroom guide walks you through the most common shower installation mistakes homeowners and contractors make - and exactly how to avoid them. From choosing the wrong substrate for your shower wall panels to skipping the installation manual, we have got you covered. What Are the Most Common Shower Installation Mistakes? The most common mistakes include using the wrong substrate behind shower wall panels, ignoring the installation manual, using mismatched base materials, incorrectly shimming the shower base, and assuming all shower kits have the same panel or glass thickness. Each of these can affect the durability, safety, and appearance of your finished shower. Mistake #1: Skipping the Installation Manual This is the number one mistake - and the most avoidable. Every shower kit is different, and the installation manual is written specifically for your model. Dimensions, substrate requirements, wall thickness limits, shimming instructions - all of it lives in that document. Manufacturers publish installation videos and downloadable manuals for every shower model on their websites. These are model-specific guides, which means what works for one unit may not apply to another. Always follow the manual that matches your exact product. Pro Tip: Download the installation manual before ordering your shower kit. Check substrate requirements and wall thickness specs so your space is already prepped when the kit arrives. Mistake #2: Using the Wrong Substrate Behind Shower Wall Panels Shower wall panels are thin and factory-formed - most are only around 3.0 to 3.2 mm thick (about 1/8 inch). Because of this, the backing you install them on matters enormously. A soft, uneven, or unsuitable substrate will cause panels to flex, crack, or fail over time. The standard requirement is a continuous exterior-grade plywood backer - typically between 1/2 inch and 3/4 inch thick. Some models also accept properly installed cement board, but the finished wall thickness where the shower doors mount must not exceed 3/4 inch. Always check your model's installation manual for the exact substrate specification before you start. What to avoid: Drywall or green board behind shower wall panels. These materials absorb moisture and will eventually cause the panels to separate, warp, or allow mold growth behind the wall. Mistake #3: Assuming All Shower Doors Have the Same Glass Thickness Not all shower doors are built the same, and glass thickness is a spec that many people overlook. Lighter shower door styles typically use 6.0 mm (approximately 1/4 inch) tempered safety glass, while heavier frameless or premium doors use 10 to 12 mm glass (roughly 3/8 to 1/2 inch). This difference affects how the door is mounted, what hardware is used, and how the frame or hinges are positioned. If you're replacing just the door - not the full shower kit - you need to confirm the glass thickness matches the existing hardware. Mixing glass weights with incompatible hardware is a safety risk. Remember: All quality shower doors use tempered safety glass. When in doubt, check the parts figures in your model's installation manual for the exact callout. Mistake #4: Not Leveling and Shimming the Shower Base Properly A shower base that isn't level causes water to pool in the wrong areas, puts stress on the drain connection, and creates visible gaps around the walls. This is one of the most common installation errors - and one of the hardest to fix after the fact. Most shower kit installation manuals specifically emphasize shimming the base until it sits completely level before securing it. This step cannot be skipped. Shower bases are molded from acrylic, fiberglass, or thermoplastic materials like ABS and PVC - materials that are rigid but not self-adjusting. If the floor beneath is uneven, the base will follow the floor unless you correct it with shims. Mistake #5: Substituting the Wrong Drain or Base When a shower kit comes with a base, it includes a specific drain center measurement. Swapping in a different base or drain without verifying the drain center location is a common mistake that results in either a misaligned drain or a base that doesn't sit flush. Always use the base included with your shower kit. If you need to substitute, verify the drain center before purchasing an alternative. Drain components are typically molded from polypropylene or PVC, and base materials are usually acrylic, fiberglass, or thermoplastic - all of which have specific chemical compatibilities with sealants and adhesives. Don't Forget the Rest of the Bathroom: Vanities, Cabinets, and Tubs Shower installation doesn't happen in isolation. If you're doing a full bathroom renovation, you're also likely dealing with vanity cabinets, vanity tops, LED medicine cabinets, and possibly freestanding bathtubs. Each of these has its own installation considerations. Vanities and Vanity Tops Vanity cabinets should be moisture-resistant - look for MDF or composite construction with properly sealed panels. Vanity tops in engineered marble or quartz are typically around 3/4 inch thick. A common mistake is anchoring vanities to drywall alone. Always fasten into wall studs, especially when the vanity top is made from stone or engineered marble. LED Medicine Cabinets LED medicine cabinets with integrated dimming and defogger features require a proper electrical connection - this is not a DIY step unless you are qualified. The good news is that LED drivers and bulbs in quality medicine cabinets are typically serviceable, meaning you can replace components without replacing the entire unit. Always confirm the cabinet is rated for bathroom use and that wiring meets local code. Freestanding Bathtubs Freestanding bathtubs are typically acrylic. A common mistake is using harsh chemical cleaners that damage the acrylic surface. Always use acrylic-safe cleaning products. Also, confirm the floor can support the combined weight of the tub, water, and occupant before installation - freestanding tubs filled with water can be extremely heavy. Quick Reference: Shower Installation Checklist • Read your model-specific installation manual before starting • Confirm substrate: continuous exterior-grade plywood (1/2"–3/4") or cement board per manual • Verify finished wall thickness does not exceed 3/4" at door mounting points • Level and shim your shower base before securing • Use the base and drain included with your shower kit - verify the drain center if substituting • Confirm glass thickness (6 mm for lighter doors, 10–12 mm for frameless) matches hardware • Use moisture-resistant materials throughout - vanity cabinets, substrate, and sealants • Have a qualified electrician handle LED medicine cabinet wiring • Use acrylic-safe cleaners on freestanding bathtubs and acrylic shower bases Final Thoughts A successful shower kit installation comes down to preparation and following your installation manual. Most mistakes happen when people skip specifications, assume one size fits all, or rush through substrate and leveling steps. Take the time to read your model-specific guide, use the right materials, and confirm every measurement before you commit. Whether you are installing a complete shower kit with wall panels and shower doors, or building out a full bathroom with vanities, LED medicine cabinets, and a freestanding bathtub - the details matter. Get them right, and you will have a bathroom that looks great and lasts for years.

Bathroom Guide: Shower Kits and Vanity Installation & Materials
Installing a new shower can feel like a big job - but with the right information, it's actually very manageable. Dreamwerks shower kits are designed to make installation straightforward, even for first-timers. That said, there are a few key steps that make the difference between a shower that looks great and lasts for years and one that causes problems down the line. In this guide, we break down everything you need to know about installing your Dreamwerks shower kit - what's in the box, how to prepare the wall properly, where to place the drain, how to handle panels before installation, and how to seal everything the right way. What Comes in a Dreamwerks Shower Kit? Before you start any installation, it helps to know exactly what you're working with. A standard Dreamwerks shower kit includes everything you need to get a complete, functional shower up and running. Here's what you can expect inside the box: • Shower base or pan • Wall panels • Door and glass • Drain and drain cover • Hardware and fasteners • Shelves or accessories (model dependent) • Installation manual Always go through the full parts list before you begin. If anything is missing or damaged, contact Dreamwerks support before starting. It's much easier to sort this out before the walls are open. Step 1: Prepare the Right Substrate (Wall Backing) This is the most important step that people skip - and it causes the most problems. Dreamwerks wall panels are not meant to be installed directly onto bare studs. You need a solid, continuous backing behind them. Use Exterior-Grade Plywood The recommended substrate is exterior-grade plywood, either 1/2" or 3/4" thick. It should cover the entire wall surface without any gaps - this is what "continuous backer" means. Plywood gives the panels a flat, stable surface to bond to and screw into, preventing rippling and keeping everything tight over time. What About Cement Board? Cement board (like HardieBacker) can be used when you want extra moisture protection - but it's typically installed over the plywood, not instead of it. If you're using cement board, make sure it's properly fastened with corrosion-resistant screws and that all joints are taped. Going straight to cement board without plywood behind it can reduce screw retention and lead to panel movement. Pro tip: Think of plywood as the structural layer,r and cement board as the moisture-protection layer. For most bathroom renovations, plywood alone is sufficient - cement board is a bonus step for high-humidity environments. Step 2: Check Your Drain Placement Before Anything Else Drain placement is one of the most common causes of installation headaches - and it's completely avoidable if you check it before you start. Every shower base has a specific drain center location - the exact spot where the drain sits within the pan. If you're using a different base than the one that came with the kit, or if you're connecting to older plumbing, this measurement needs to match exactly. Here's what to do: • Measure the drain center on your new base from both the back wall and the side wall. • Compare it to the drain location in your existing floor plumbing. • If the numbers don't match, you'll need to adjust your plumbing before the base is set. • Never assume two bases are interchangeable - even small differences (an inch or two) can cause big fitting problems. Taking 10 minutes to confirm drain placement before installation starts can save you hours of rework later. Step 3: Let the Panels Acclimate Before Installing This step surprises a lot of people, but it's important - especially if the panels were stored in a garage, warehouse, or van before installation. Shower wall panels - like most building materials - expand and contract slightly based on temperature and humidity. If you bring cold panels into a warm bathroom and install them right away, they may shift or expand after they're attached, which can lead to gaps, warping, or lifted edges. How to Acclimate Your Panels Properly • Store panels flat-never lean them upright against a wall, as this can cause bowing. • Place them in the room where they'll be installed. • Leave them for 24 to 72 hours before installation begins. • Make sure the room is at its normal temperature and humidity - don't rush this with heaters or fans. It's a simple step that takes no effort - just time. And it makes a real difference in how the finished installation looks and holds up. Step 4: Install the Base and Set It Level Once your plumbing is confirmed and your substrate is ready, you can set the shower base. Leveling is critical here - an uneven base affects how water drains, how the door seals, and how the panels sit on top. Use a spirit level across the base in multiple directions. Shim under the base as needed until it's perfectly flat. Once it's level, connect the drain according to the manual - this usually involves a flange seal, a rubber gasket, and the drain cover. Use butyl tape or the manufacturer-recommended gasket for the flange to ensure a watertight connection. Step 5: Attach the Wall Panels Correctly With the substrate ready and the base set, it's time to put up the wall panels. The installation manual for your specific Dreamwerks model will show the exact order and layout - always follow that guide for your model. Here are the key principles that apply across most kits: Adhesive Selection Use a polyurethane or MS-polymer (hybrid) construction adhesive - products like Loctite PL Premium or SikaBond work well. These bond well to both plywood and plastic panels, and they stay flexible after curing, which is important in a wet environment. What to Avoid • Solvent-based adhesives - these can cloud, soften, or damage acrylic, ABS, or PVC panels. • Acetoxy (acid-cure) silicones - they have a vinegar smell and can damage metal finishes over time. • Permanent marine adhesives like 3M 5200 - these make future panel removal nearly impossible. Fasteners Use stainless steel or corrosion-resistant screws as specified in your manual. Don't overtighten - particularly near cement board edges, as overdrive can crack the backer. Use washers or trim caps where the manual calls for them. Step 6: Seal Every Joint for a Watertight Finish Sealing is the last step - and one of the most important. Even the best installation will develop leaks over time if the sealing isn't done right. Use the Right Silicone Always use 100% neutral-cure silicone that is specifically mildew-resistant. This type of silicone does not release acetic acid (the vinegar smell), so it won't corrode metal hardware or finishes. You can find mildew-resistant neutral-cure silicone at any hardware store - just check the label before buying. Where to Seal • All butt joints between panels (where two panel edges meet) • All perimeter transitions - where the panels meet the ceiling, floor, or adjoining walls • The wall-to-base transition - this is where most leaks happen if skipped • Around any cutouts for niches, shelves, or fixtures Apply a smooth, consistent bead of silicone and use a caulk finishing tool (or a damp finger) to press it into the joint. Let it cure fully - usually 24 hours - before running water. Tip: Tape the edges of the joint with masking tape before applying silicone for a clean, professional line. Peel the tape while the silicone is still wet. What Are Dreamwerks Shower Kit Parts Made From? One of the most common questions customers ask is about materials - what the panels, base, and doors are actually made of, and how thick they are. Here's a straight breakdown. Wall Panels Dreamwerks shower wall panels are typically made from PVC, ABS, acrylic, or cultured marble-style composite materials. All are engineered to be water-resistant and easy to clean. Most wall panels in the Dreamwerks range are approximately 3.0 to 3.2 mm thick (roughly 1/8") - though this varies by model, so always check your specific model manual for exact specs. Shower Bases and Pans Shower bases are molded from acrylic and fiberglass or high-density thermoplastic (ABS/PVC), depending on the model. These materials create a rigid, waterproof pan that resists cracking and holds up well over time. Drain covers and drain flanges are typically polypropylene or PVC, with rubber or butyl gaskets for a long-lasting watertight seal. Shower Doors and Glass All Dreamwerks shower doors use tempered safety glass. The thickness varies by style: • 6 mm (approximately 1/4") for lighter framed door styles • 10 to 12 mm (approximately 3/8" to 1/2") for heavier frameless or premium doors Door hardware - rails, handles, hinges - is aluminum or stainless steel, available in Black, Chrome, or Brushed Nickel finishes. All hardware is corrosion-resistant and matched to the kit finish. Trim, Hardware, and Small Fittings Trim pieces and hardware come in Brushed Nickel, Chrome, or powder-coated aluminum/steel. Drain covers and flanges are stainless steel or plated metal. Seals and gaskets throughout the kit are typically 3 to 5 mm rubber or butyl - small parts, but important for keeping water where it belongs. Shelves and Accessories Shelves are either tempered glass or molded plastic, depending on the model. Both options are designed for a wet environment and are easy to wipe clean. What Are Dreamwerks Vanities and Vanity Tops Made From? Dreamwerks vanities are built for the bathroom environment, which means moisture resistance is baked into every part of the design. Vanity Cabinets Cabinet boxes are constructed from moisture-resistant engineered materials - either Hi-Tek or composite cabinetry, or sealed MDF with waterproof finishes. These materials are specifically chosen to handle bathroom humidity without warping or swelling over time. Higher-end models in the range use solid wood or veneered construction with water-resistant topcoats. Vanity Tops Dreamwerks offers several vanity top materials depending on the collection: • Engineered marble - durable, consistent in appearance, easy to maintain • Cultured marble - a classic look with good water resistance • Ceramic - practical and affordable • Carrara marble - a premium natural stone option for a high-end finish Most standard vanity tops are 3/4" (0.75") thick, which gives a clean, modern profile and solid structural strength. Many tops come with integrated or undermount sinks already built in, so you get a seamless, easy-to-clean surface right out of the box. LED Medicine Cabinets, Mirrors, and Lighting Dreamwerks LED medicine cabinets do a lot more than just store things. Here's what you get with most models in the range: • Integrated LED lighting built directly into the cabinet frame • Dimmable color temperature - adjust from warm to cool light depending on your preference or the time of day • Built-in anti-fog or defogger function - no more wiping the mirror after a hot shower • Touch button or touch strip controls for all lighting and fog functions • Internal tempered glass shelves for storage • Soft-close hinges for a quiet, premium feel The LED modules and drivers are serviceable - meaning if a component needs replacing down the line, you can get the part and swap it out rather than replacing the whole cabinet. All LED medicine cabinets come with a 1-year limited warranty covering defects. If you're choosing between a standard mirror and an LED medicine cabinet, the cabinet gives you built-in storage, better lighting for grooming, and the anti-fog feature - all in one unit. Freestanding Bathtubs Freestanding bathtubs in the Dreamwerks collection are made from high-quality cast or reinforced acrylic. Here's why that material works well for a freestanding tub: • Lightweight - easier to move and install compared to cast iron or stone resin • Glossy finish - looks clean and is easy to wipe down • Good thermal retention - acrylic holds heat well, so your water stays warm longer • Rigid and durable - reinforced bases or composite supports are used on certain models for added strength Acrylic tubs should be cleaned with acrylic-safe, non-abrasive cleaners. Avoid harsh scrubbing pads or chemical solvents, as these can dull the surface over time. Dreamwerks freestanding tubs are designed to be the centrepiece of a bathroom - the combination of a glossy shell, a clean silhouette, and solid build quality makes them a strong choice whether you're doing a full bathroom renovation or replacing a single fixture. Tools You'll Need for Installation Before you start, make sure you have all the right tools ready. Here's a practical list: • Spirit level and chalkline for checking flat walls and marking panel lines • Straight edge for checking substrate flatness • Cordless drill for fasteners and any cutouts • Jigsaw for niche cutouts, drain openings, and fitting around fixtures • Silicone gun and caulk finishing tools for applying and smoothing the silicone • Shims for leveling the base • Tape measure for drain placement and panel layout For heavier panels and the base, having a second person makes the job much easier and safer. Don't try to lift or maneuver large panels alone. Quick Installation Checklist Use this as a final pre-install and post-install check: • All kit parts accounted for-check against the parts list in the manual • Plywood backer installed-continuous, 1/2" to 3/4" exterior grade • Drain center measured and confirmed against floor plumbing • Panels stored flat and acclimated 24–72 hours in the installation room • Base set and leveled shims in place, drain connected with gasket/butyl seal • Wall panels installed per model-specific manual, correct adhesive used • All joints sealed with neutral-cure, mildew-resistant silicone • Silicone allowed to cure fully before using the shower (minimum 24 hours) Final Thoughts Installing a Dreamwerks shower kit doesn't have to be complicated, but it does require doing a few things in the right order. The biggest mistakes people make are skipping the plywood backer, not acclimating the panels, and rushing past the sealing step. Get those right, and the rest of the installation will go smoothly. Every Dreamwerks shower model comes with a downloadable installation manual and video guide at dreamwerks.com. Always use the guide specific to your model number, panel layouts, fastener specs, and cutout dimensions vary between kits.